You’re probably tired of tangled charging cables cluttering your nightstand and searching for outlets in the dark. These phone-powered side tables solve those everyday frustrations while adding serious functionality to your living space. From IKEA hacks with built-in wireless charging to elaborate builds featuring Bluetooth speakers and hidden cooling drawers, you’ll discover projects that transform ordinary furniture into tech-savvy command centers that’ll make your friends wonder where you bought them.
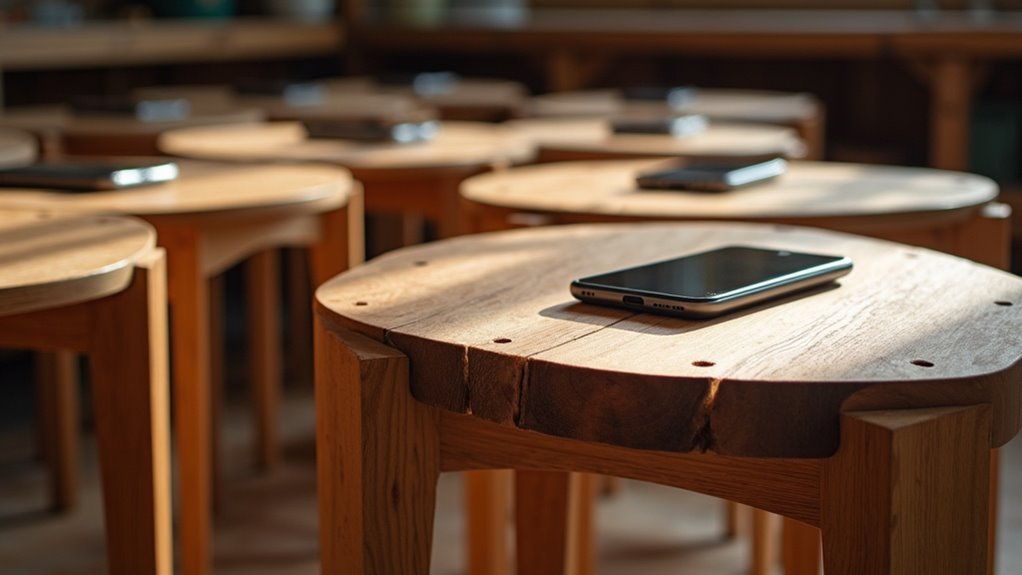
IKEA Base Wireless Charging Table Build

Building a wireless charging table from an IKEA base requires just a few materials and basic woodworking skills.
Transform any IKEA table into a sleek wireless charging station with minimal materials and straightforward DIY techniques.
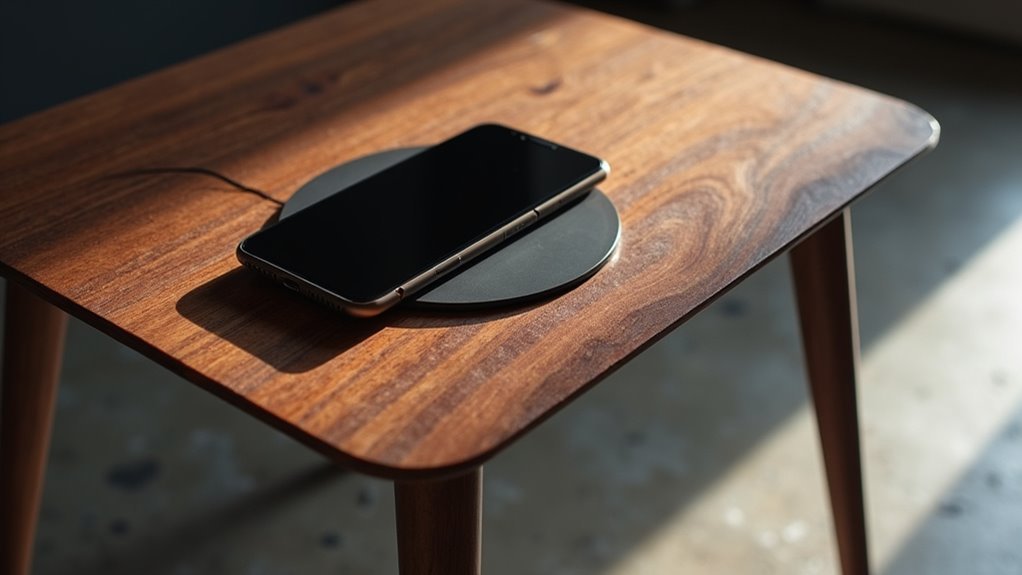
You’ll need ¼ inch and ½ inch plywood, a wireless charging pad, wood glue, and short screws. Start by tracing the circular metal top onto both plywood pieces, marking where you’ll place the charger. Cut everything out using a jigsaw after drilling access holes.
Apply wood glue between the plywood pieces and secure with short screws, ensuring they don’t penetrate where the wireless charging pad sits.
Once dry, mark your phone’s position with pencil and chisel for visibility. Stain and seal the table, then reattach it to the base.
Test the charging functionality and enjoy your clutter-free charging station.
USB Hub Integration for Bedside Tables
When you’re ready to upgrade your bedside charging setup, integrating a USB hub transforms your nightstand into a powerful charging station.
You’ll eliminate cord clutter while maintaining easy access to multiple charging ports, including USB-C and fast charging capabilities.
Here’s how to create your USB charging solution:
- Install the hub inside a drawer – Mount your USB hub within the drawer space, allowing cords to remain hidden while keeping ports accessible through a small opening.
- Add wireless charging to the surface – Router a pocket into the tabletop to accommodate a wireless charging pad, creating a seamless charging area without cables.
- Drill ventilation holes – Create airflow near charging components to prevent overheating and guarantee safe operation of your integrated charging system.
Recessed Power Strip End Table Conversion

Moving beyond nightstand solutions, you can take your charging setup to the next level by converting an end table with a recessed power strip installation. Start by drilling carefully measured holes in your tabletop to accommodate the recessed power strip, ensuring it sits flush and secure.
This modification eliminates unsightly cord clutter while providing easy access to multiple charging options right at your fingertips. Choose a recessed power strip with both AC outlets and USB ports to maximize functionality in your compact design.
You’ll simultaneously charge various devices without sacrificing table space. This DIY conversion transforms outdated furniture into modern charging stations, dramatically improving usability while maintaining clean aesthetics.
The streamlined look makes cleaning easier and enhances your living space’s overall appearance.
Bluetooth Speaker Side Table With Cooling Drawer
While recessed power strips offer excellent charging solutions, a Bluetooth speaker side table with cooling drawer elevates your furniture’s functionality to premium levels.
This innovative piece transforms ordinary furniture into a smart entertainment hub that’ll revolutionize your relaxation space.
The thermoelectric cooler drawer chills beverages up to 20 degrees below room temperature, ensuring your drinks stay perfectly cold. Wireless charging capabilities let you power two devices simultaneously on the surface, eliminating cable clutter. Built-in Bluetooth speakers deliver quality audio for enhanced multimedia experiences.
Key features that make this project exceptional:
- Motion-activated LED lighting provides automatic illumination when you approach
- App-enabled controls manage intelligent sleep mode and RGB accent lighting
- Dual wireless charging zones accommodate multiple devices without crowding
This multifunctional design combines entertainment, convenience, and style seamlessly.
Hidden Compartment Charging Station Design
For those who prefer a cleaner aesthetic without visible tech features, a hidden compartment charging station design offers the perfect balance of functionality and minimalism.
You’ll integrate a USB charging hub inside your bedside table drawer, creating a tidy storage solution for charging gadgets. Position the wireless charging pad on the table’s surface while routing a pocket from the top to accommodate the charger without requiring access from below.
Include ventilation holes to prevent overheating, ensuring safety and peak performance. Use double-sided tape for inlaying components within the drawer, allowing easy access for future replacements or upgrades.
This hidden compartment charging station enhances organization, reduces surface clutter, and contributes to a more aesthetically pleasing living space.
Motion-Activated LED Charging Table
The motion-activated LED charging table transforms your nighttime routine by automatically lighting up when you approach, eliminating fumbles in the dark while providing seamless wireless charging capabilities.
This innovative piece combines practical functionality with sleek aesthetics that complement any modern decor style.
You’ll appreciate how this wireless charger integrates directly into the tabletop surface, eliminating cable clutter while maintaining clean lines. The sturdy construction supports multiple devices simultaneously through additional USB ports.
Here’s what makes this design essential:
- Motion sensors trigger LED illumination automatically when you enter the room
- Hidden cord management keeps charging cables organized within a concealed compartment
- Versatile charging options accommodate both wireless and wired devices simultaneously
This table perfectly balances form and function for contemporary living spaces.
Thermoelectric Cooler Side Table Project
When you’re ready to elevate your living space with cutting-edge functionality, this thermoelectric cooler side table project delivers an impressive combination of beverage chilling, wireless charging, and entertainment features.
The drawer chills beverages up to 20 degrees below room temperature, keeping drinks perfectly cold within arm’s reach. You’ll charge two devices simultaneously using wireless technology, eliminating cord clutter around your end table.
Built-in Bluetooth speakers provide quality audio integration for enhanced entertainment.
Motion-activated LED lighting offers convenience in low-light settings while adding ambient appeal.
App-enabled features include intelligent sleep mode and customizable RGB back accent lighting, giving you complete control over your table’s functionality and aesthetics.
This multifunctional end table transforms any room into a high-tech relaxation zone.
Dual Wireless Charging Pad Table Modification
You’ll need to carefully plan the placement of two wireless charging pads to accommodate multiple devices simultaneously.
Start by cutting separate openings in your plywood for each pad, ensuring they’re spaced far enough apart to prevent interference.
Set up your power distribution system with a dual-port adapter or individual power supplies to keep both charging pads running efficiently.
Dual Pad Placement
Before diving into the modification process, confirm you’ve selected two wireless charging pads that match your table’s dimensions and power needs.
Dual pad placement requires careful consideration to maximize functionality while maintaining visual appeal.
When positioning your charging pads, follow these essential guidelines:
- Space pads adequately apart – Confirm enough distance between charging zones to accommodate various phone sizes without interference or crowding.
- Maintain aesthetic symmetry – Position pads evenly across the table’s surface to create a balanced, professional appearance that complements your furniture design.
- Plan for accessibility – Place charging areas where users can easily position and retrieve devices without obstruction from other table elements.
Proper dual pad placement confirms both charging zones function effectively while creating an elegant, user-friendly surface for your side table.
Cutting Multiple Openings
Since you’ve finalized your pad placement, it’s time to precisely mark and cut the openings that’ll house both wireless charging pads.
Start by drilling holes in each corner of your marked areas—this gives your jigsaw clean entry points for cutting multiple openings without splintering the wood. Carefully cut along your marked lines, maintaining steady control to guarantee each opening matches your wireless charging pad dimensions exactly.
After completing both cuts, sand all edges thoroughly to eliminate rough spots and splinters. This step’s essential for achieving that professional finish you want.
The smooth edges will also help your charging pads sit flush within their openings. Take your time with this process—precise cuts now mean easier installation later and better overall functionality for your dual wireless charging table.
Power Distribution Setup
With your charging pad openings perfectly cut, focus on establishing a reliable power distribution system that’ll supply consistent electricity to both wireless charging pads.
This charging station requires careful wiring and power management to guarantee ideal performance.
Here’s your power distribution setup process:
- Install the power strip – Mount a power strip with an on/off switch beneath the table for easy access and clutter reduction, providing centralized control over your charging station’s power supply.
- Route the wiring – Connect both charging pads to the power strip through appropriate wiring, ensuring cables are secured and won’t interfere with the table’s functionality.
- Test functionality – Place devices on both charging pads after reassembly, verifying proper alignment and charging efficiency before finalizing your setup.
App-Controlled RGB Accent Lighting Table
App-controlled RGB accent lighting tables transform your living space into a personalized light show with just a few taps on your smartphone.
You’ll connect this innovative side table via Bluetooth, giving you complete control over brightness, color shifts, and lighting modes without any physical switches. Choose from thousands of colors and effects to match your mood or decor perfectly.
Complete wireless control lets you instantly customize thousands of colors and lighting effects to perfectly complement any mood or room aesthetic.
The real magic happens when you sync the lighting with your music, creating dynamic visuals that pulse and change with the beat. Your iOS or Android device easily controls everything through an intuitive app interface.
Built-in cable management keeps your charging cords organized, maintaining that clean aesthetic while you enjoy vibrant lighting effects that enhance any gathering or quiet evening.
Cable Management Nightstand Upgrade
You can transform your cluttered nightstand into a sleek charging station by incorporating hidden compartments and smart cord organization solutions.
Installing a USB charging hub inside your drawer keeps multiple devices powered while maintaining a clean surface appearance.
Strategic cable routing through drilled holes and built-in compartments eliminates tangled wires and creates a more organized bedroom environment.
Hidden Charging Compartments
Although visible cables and charging ports can clutter your nightstand’s clean aesthetic, hidden charging compartments offer an elegant solution that keeps your devices powered while maintaining a sleek appearance.
You’ll create a seamless charging experience by integrating these concealed features into your nightstand design.
To build effective hidden charging compartments, follow these essential steps:
- Router a pocket into the tabletop for wireless charging pad integration, keeping the mechanism discreet yet accessible for your phone.
- Install a USB hub within the drawer to organize multiple device charging without visible cables cluttering your space.
- Add ventilation holes and use double-sided tape for component mounting, ensuring proper airflow and easy access for future repairs or replacements.
Consider adding secret storage compartments beneath USB housing for additional functionality.
Cord Organization Solutions
When multiple device chargers create a tangled mess around your nightstand, strategic cord organization transforms chaos into a streamlined charging station.
You’ll want to install power strips with on/off switches inside your drawers, giving you complete control over multiple devices while keeping cords hidden from view.
Drill precise holes in your furniture’s back panel to route cables discreetly without disrupting your table top’s clean appearance. This simple modification allows power strips to nest inside drawers while maintaining easy access to charging ports.
Consider adding small baskets or dividers within drawers to organize charging accessories and keep different cables separated.
You can also incorporate wireless charging pads directly into your table top design, eliminating additional cord clutter for compatible smartphones.
Frequently Asked Questions
What Safety Certifications Should I Look for When Buying Charging Components?
You should look for UL, CE, and FCC certifications when buying charging components. These guarantee electrical safety, electromagnetic compatibility, and regulatory compliance. Don’t buy uncertified chargers as they’re fire hazards.
How Much Weight Can a DIY Phone-Powered Side Table Typically Support?
You’ll typically support 20-50 pounds depending on your table’s construction materials and design. Solid wood frames handle more weight than particle board, while proper joinery and thicker legs increase your table’s overall load capacity considerably.
Will Adding Charging Features Void My Furniture Warranty?
You’ll likely void your warranty by adding charging features to manufactured furniture. Most warranties don’t cover modifications or electrical additions. Check your specific warranty terms before proceeding with any DIY electrical work.
What’s the Average Cost to Build a Basic Phone-Powered Side Table?
You’ll spend around $50-150 for basic materials like wood, screws, and simple charging components. Costs vary based on wood quality, charging ports needed, and whether you’re repurposing existing furniture pieces.
How Do I Troubleshoot Charging Issues After Completing My Build?
Check you’ve properly connected all wiring first. Test your power source with a multimeter. Verify USB ports aren’t damaged. Confirm charging cables work separately. Look for loose connections inside your table’s electrical compartment.


Leave a Reply