You’ve probably stared at that Arlo doorbell box wondering if installation will turn into a weekend-long headache. The good news? It doesn’t have to be complicated if you know what you’re doing. Most people make critical mistakes that could’ve been avoided with proper preparation and the right approach. These five essential tips will save you time, frustration, and potentially costly errors that can leave your doorbell malfunctioning.
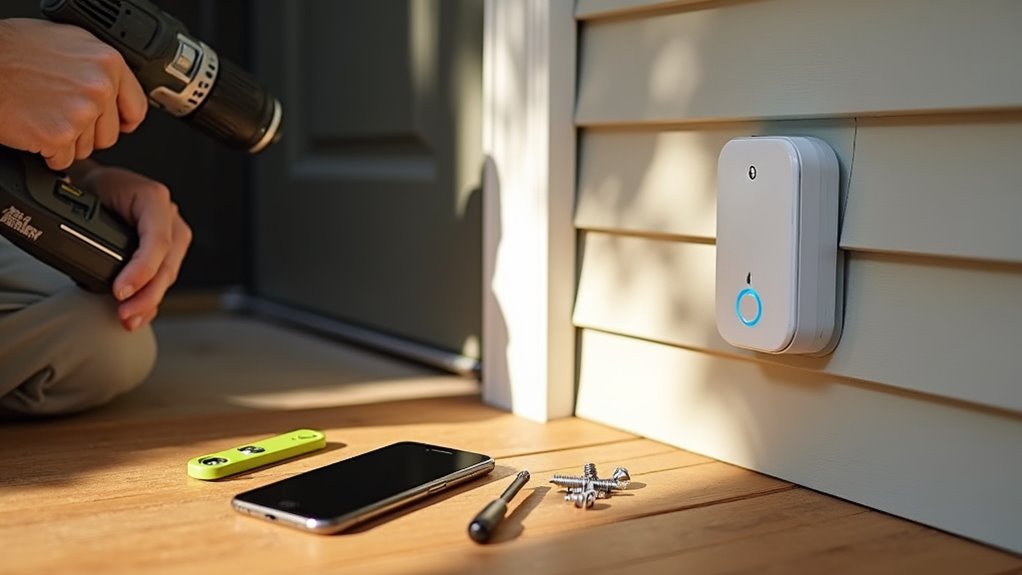
Gather Essential Tools and Equipment Before Starting
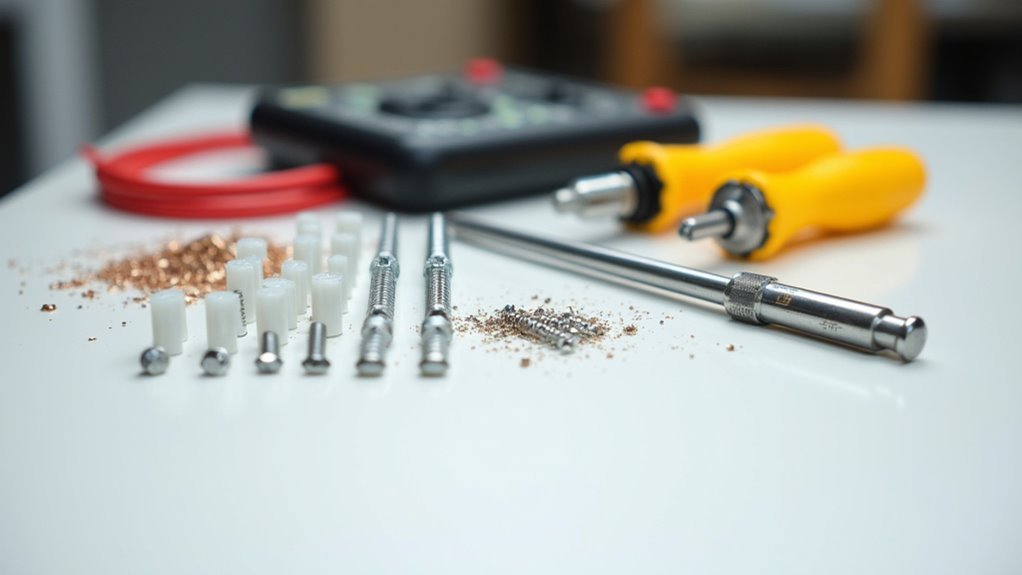
Preparation is the foundation of any successful Arlo doorbell installation. You’ll need specific tools and equipment depending on your chosen setup method.
For wired installations, gather a Phillips head screwdriver, ladder for chime box access, and 6mm drill bit for new holes. Verify you have a compatible transformer rated 16-24V AC for proper power delivery.
Wireless installations require a charged rechargeable battery and the Arlo Secure App on your mobile device. Both methods need a power drill for mounting and wall anchors for secure attachment on certain surfaces.
Check your Arlo package contents carefully, confirming you have the mounting plate, screws, and Power Kit for wired setups. Having all necessary tools ready beforehand prevents installation delays and guarantees smooth completion.
Download the Arlo App and Check Network Requirements
Technology serves as your gateway to seamless Arlo doorbell functionality, making the app download and network verification essential first steps.
Technology bridges the gap between complex smart home systems and effortless user control through strategic preparation.
You’ll need to download the Arlo app from your mobile device’s app store to begin the installation process. The Arlo Secure App serves as your primary control center for setup and ongoing management.
Before proceeding, check network requirements to guarantee compatibility. Your mobile device must connect to a 2.4 GHz Wi-Fi network, as this frequency is required for proper doorbell operation.
Consider these critical factors:
- Verify you have a high-speed internet connection for peak performance
- Confirm strong signal strength at your doorbell’s planned location
- Update the app to prevent compatibility issues during installation
Proper network preparation prevents frustrating delays later.
Locate Your Chime Box and Turn Off Power Safely
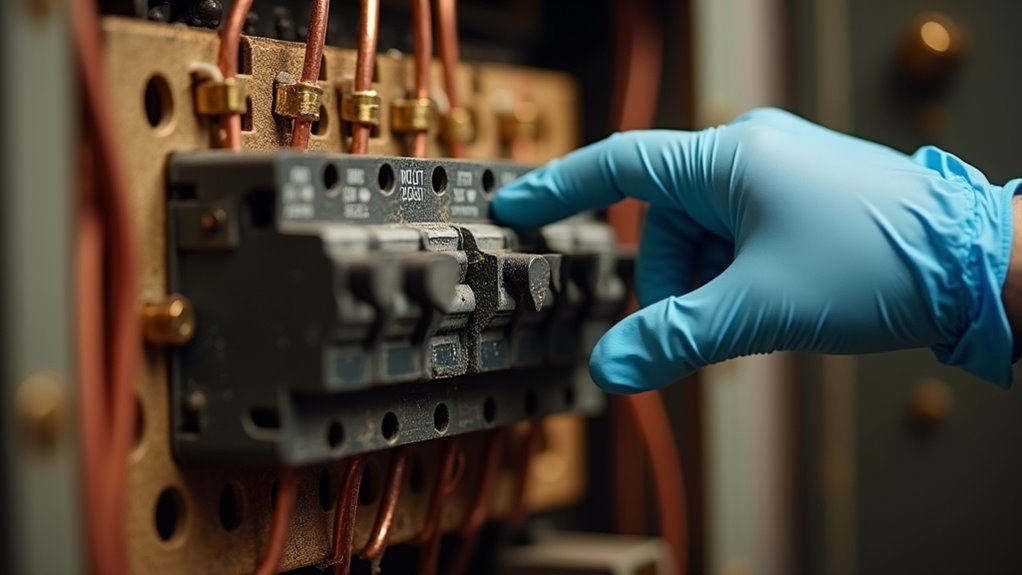
Before you can install your Arlo doorbell, you’ll need to locate your chime box and safely disconnect power to prevent electric shock. Start by pressing your existing wired doorbell and listen for the chime sound to determine the box’s location. Once found, turn off the power at the breaker to cut the electrical supply.
| Step | Action | Safety Check | Location Tip |
|---|---|---|---|
| 1 | Ring existing doorbell | Listen for chime sound | Check hallways first |
| 2 | Turn off power at breaker | Verify chime box is silent | Near main entrance areas |
| 3 | Test electrical supply | Press doorbell again | Wall or ceiling mounted |
| 4 | Study wiring setup | Prepare for Arlo Video Doorbell installation | Note wire connections |
Install the Power Kit and Mount the Doorbell Properly
Once you’ve safely turned off the power at the breaker, you’ll begin the installation process by connecting the power kit to your chime box terminals.
Follow the Arlo app guidance precisely to avoid electrical hazards and guarantee proper functionality. The power kit provides necessary power from your existing chime box to operate the doorbell effectively.
Proper app guidance ensures safe electrical connections and optimal doorbell performance through the integrated power kit system.
Next, secure the mounting bracket at your desired location. Consider these essential factors:
- Position within Wi-Fi range for ideal connectivity
- Clear camera view without obstructions
- Appropriate height and angle for monitoring
Use a Phillips head screwdriver to attach the doorbell to the mounting bracket, making sure it’s securely fastened.
For drywall installations, drill 6mm holes and install anchors for additional support and stability.
Connect to Wi-Fi and Test Your Installation
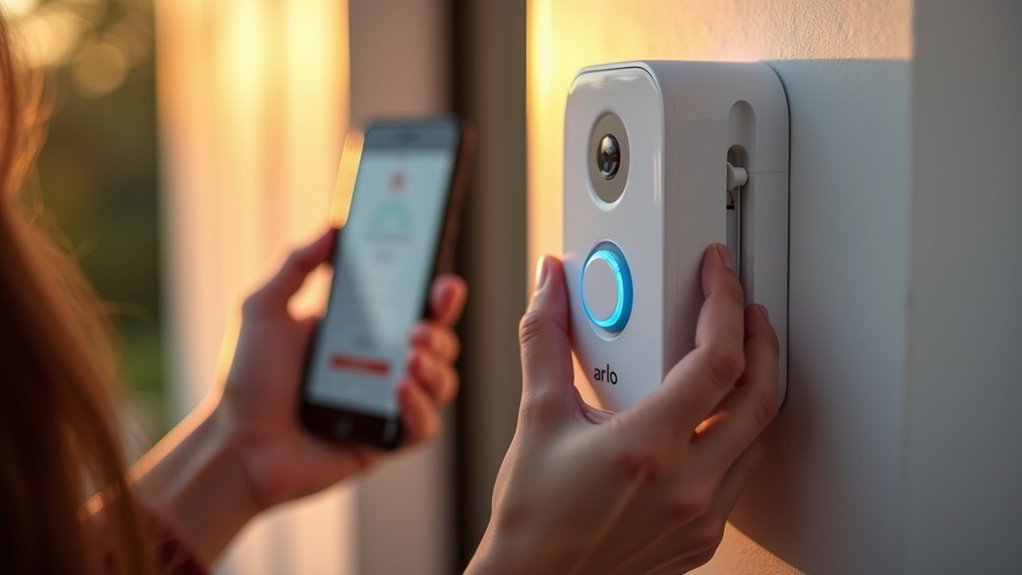
After completing the physical installation, you’ll need to establish a Wi-Fi connection to activate your Arlo doorbell’s smart features.
First, ascertain your mobile device connects to a 2.4 GHz Wi-Fi network since the Arlo Essential only supports this frequency for connectivity.
Open the Arlo Secure App and scan the QR code that appears during setup to link your doorbell seamlessly.
Once powered on, verify the LED indicator shows solid white, confirming successful Wi-Fi connection. An amber light indicates signal or voltage issues requiring troubleshooting.
Test your installation by pressing the doorbell and checking that notifications arrive on your mobile device through the app.
If connectivity problems persist, try resetting the doorbell and repeating the Wi-Fi setup process.
Frequently Asked Questions
Why Does My Arlo Doorbell Take so Long to Connect?
Your Arlo doorbell takes long to connect due to Wi-Fi interference, weak 2.4 GHz signal strength, incompatible router settings, or outdated firmware. You’ll need to address these obstacles for faster connectivity.
Is the Arlo Doorbell Easy to Install?
You’ll find Arlo doorbell installation more challenging than Ring’s, especially the wired version requiring electrical connections. You’ll need high-speed internet, proper tools, and careful Wi-Fi placement for successful setup.
Why Is My Arlo Doorbell Not Ringing Inside the House?
Your Arlo doorbell isn’t ringing inside because you’ve got wiring issues, insufficient power, or an incompatible chime. Check your Power Kit installation, verify 16-24VAC voltage, and test your existing chime’s functionality.
What Height Should Arlo Doorbell Be Mounted?
You should mount your Arlo doorbell at approximately 48 inches (4 feet) from the ground. This height guarantees ideal viewing of visitors’ faces and packages while providing clear identification without obstructions from overhanging elements.


Leave a Reply