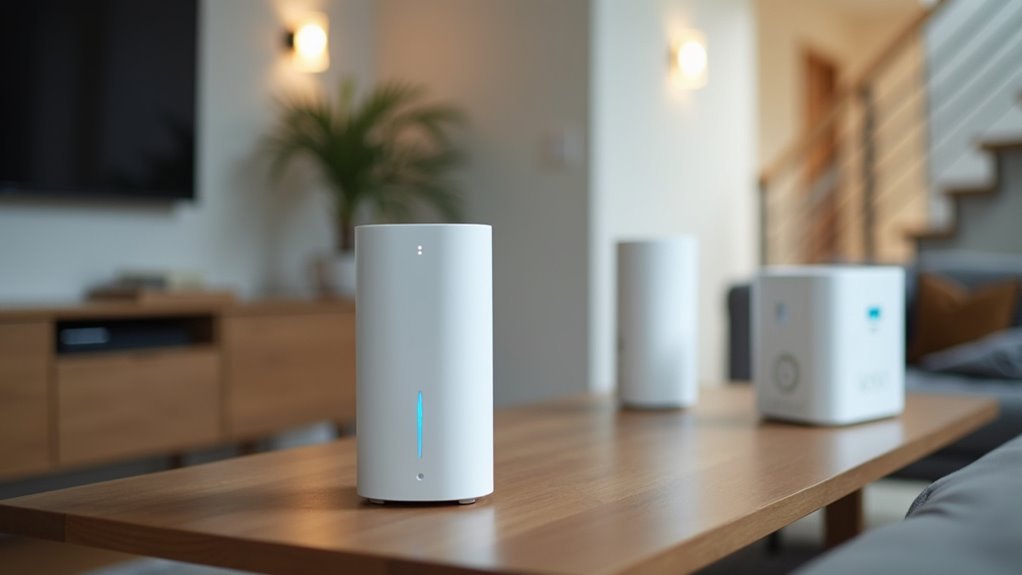
You’ve probably noticed your mesh WiFi slowing down or dropping connections more frequently lately, and you’re not alone in this frustration. While mesh networks promise seamless coverage throughout your home, they often develop performance issues that seem to appear out of nowhere. The good news is that most mesh WiFi problems stem from just a few common causes, and you can fix them yourself in minutes rather than hours.
Understanding Why Your Mesh Network Slows Down Over Time
While your mesh network may have delivered blazing speeds when you first set it up, you’ve probably noticed it doesn’t perform quite the same way months later. This slowdown happens for several reasons that compound over time.
Your once-lightning-fast mesh network has likely slowed to a crawl over the past few months.
As more devices connect to your network, you’ll experience increased interference and congestion that degrades overall performance. Your actual speeds fall considerably below the theoretical maximums advertised by manufacturers due to real-world factors like physical barriers and distance between units.
Individual mesh units can also become faulty or less effective over time, creating bottlenecks in your network. Poor placement of units compounds these issues, as walls and distance hinder communication between nodes.
Understanding these factors helps you diagnose and address performance problems effectively.
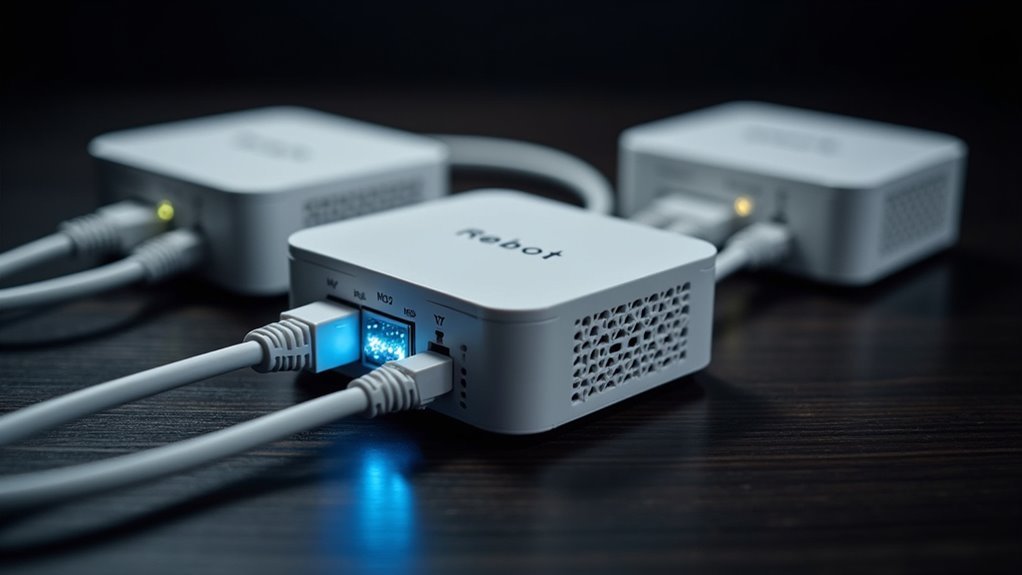
Quick Restart Method for All Mesh Units
One of the most effective troubleshooting steps you can take is performing a complete restart of your entire mesh network. Start by disconnecting all mesh routers from power for several seconds to clear temporary glitches.
Begin the restart process with your main unit that’s connected to the internet, as it serves as the primary hub. Allow this unit sufficient time to fully boot up and establish an internet connection before proceeding.
Next, power on each remaining mesh router sequentially, giving each one adequate time to connect before starting the next unit. This methodical approach helps your mesh routers select ideal Wi-Fi channels and resolve connectivity issues.
After completing the restart sequence, verify that each unit is properly communicating with others to guarantee optimal network coverage and performance.
Proper Sequencing When Rebooting Multiple Units
When you’re rebooting multiple mesh units, you can’t just power them all on at once and expect ideal results.
You’ll need to start with your main router first, then wait 2-3 minutes before powering on each secondary unit in sequence.
This methodical approach helps each unit establish proper connections and select less congested channels for better overall network performance.
Start With Main Router
If you’re experiencing mesh WiFi connection problems, the order in which you reboot your units can make all the difference. Always start with your main router first – it’s the foundation of your entire mesh network and needs to establish a stable connection before any satellite units come online.
Power on your main router and wait for it to fully boot up and connect to your internet service provider. This typically takes 2-3 minutes. Once you see solid indicator lights showing a stable connection, you can proceed to power on your additional mesh units one at a time.
| Step | Action | Wait Time |
|---|---|---|
| 1 | Power on main router | 2-3 minutes |
| 2 | Verify stable connection | 30 seconds |
| 3 | Power on satellite units | 1-2 minutes each |
| 4 | Test network performance | As needed |
Wait Between Each Restart
Proper timing between each unit restart will make or break your mesh network’s recovery process.
You’ll need to wait 1-2 minutes after powering on each unit before starting the next one. This gives your mesh units enough time to fully boot up and establish adequate network connections.
Sequential restarts prevent channel conflicts that occur when multiple units compete for the same Wi-Fi channels during simultaneous boot-up.
If you power everything on at once, you’re setting yourself up for connection issues and degraded performance.
Start with your main router, wait for complete startup, then move to the next unit in your mesh system.
This methodical approach guarantees each device selects suitable channels and maintains network stability throughout the recovery process.
Power On Secondary Units
After your primary unit has completed its startup sequence and established internet connectivity, you can begin powering on your secondary mesh units one at a time.
Allow 1-2 minutes between each unit to guarantee proper connection establishment with the primary router. This sequential approach prevents communication conflicts that occur when multiple units attempt to connect simultaneously.
When you power on secondary units in proper sequence, you’ll avoid common connectivity issues that plague mesh wi-fi systems. This method also forces your routers to select less congested channels, boosting overall network performance.
Before powering up each unit, verify it’s positioned effectively for signal strength and coverage. Don’t rush the process – patience during startup guarantees your entire mesh network establishes stable connections and operates at peak efficiency.
Testing Your Raw Internet Speed With Direct Connection
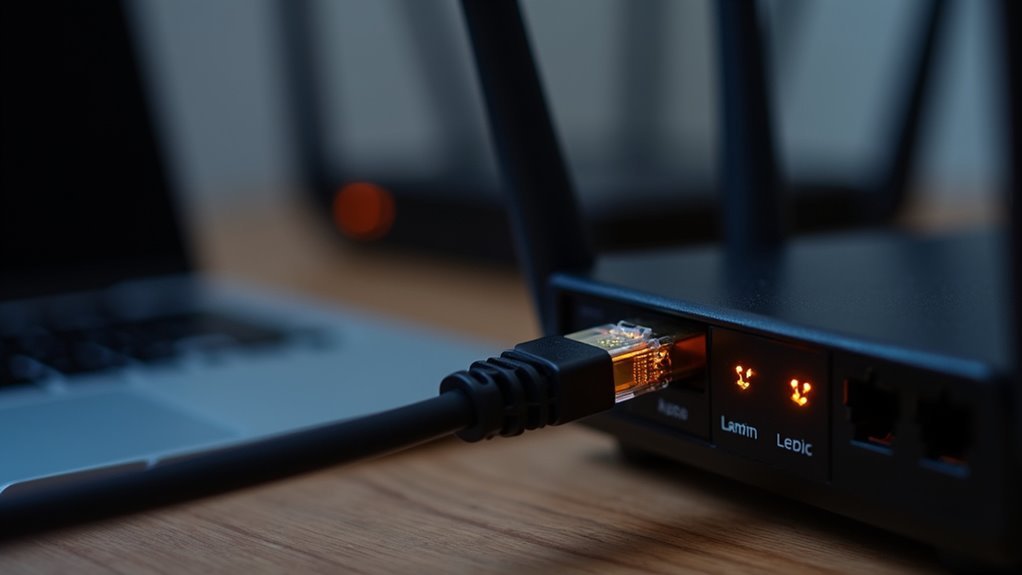
Before diagnosing mesh network issues, you’ll need to determine if the problem stems from your internet service or the mesh system itself.
Start by disconnecting your mesh router completely from the modem.
Then connect your device directly to the modem using an Ethernet cable to test your raw internet speed without any mesh interference.
Disconnect Mesh Router First
Disconnect your mesh router from the modem to establish a baseline for your internet speed testing. When you disconnect the mesh router first, you’ll eliminate variables that could skew your results and get accurate readings of your actual internet service performance.
To properly test your internet, follow these essential steps:
- Power down your mesh system completely – Unplug all mesh nodes and the main router to guarantee they’re not interfering with your connection.
- Connect directly via Ethernet – Use a cable from your modem or ONT straight to your computer for the most reliable testing setup.
- Clear the network of other devices – Make sure no smartphones, tablets, or smart home devices are consuming bandwidth during testing.
This direct connection method reveals your true internet speeds without mesh network interference.
Use Ethernet Cable Direct
Once you’ve powered down your mesh system, you’ll need to establish a direct Ethernet connection to measure your true internet performance.
Connect an Ethernet cable from your device directly to your modem’s ethernet ports, completely bypassing your mesh network. This direct connection eliminates any potential interference from your WiFi setup.
Before running the speed test, verify all other devices are disconnected from your network to prevent bandwidth consumption that could skew results.
Use a reputable speed testing website or app to measure your raw internet speed through this wired connection.
This baseline measurement reveals your actual internet service performance.
You’ll then compare these results with speeds from your mesh network to determine whether connection issues stem from your internet provider or mesh configuration.
Disconnecting Your Mesh System for Accurate Speed Tests
When troubleshooting mesh WiFi speed issues, you’ll need to isolate your internet connection from your mesh network to get accurate speed test results.
Disconnecting your mesh system helps you determine whether slow speeds stem from your internet service provider or your mesh configuration.
Follow these steps for proper testing:
- Disconnect your mesh router from the modem and connect your testing device directly via Ethernet cable
- Reboot your modem before testing to eliminate temporary connectivity issues and guarantee peak performance
- Clear all bandwidth usage by ensuring no other devices are connected during the speed test
This direct connection bypasses potential mesh-related latency and interference.
Identifying Which Mesh Unit Is Causing Problems
After confirming your baseline internet speeds work properly, you’ll need to pinpoint exactly which mesh unit might be creating bottlenecks or connection drops.
Power off all units, then turn them on one at a time while testing connectivity and speed with each activation. If speed issues appear only when a specific mesh unit powers on, that unit’s either malfunctioning or poorly positioned.
Test each mesh unit individually by connecting your device directly to it and checking for consistent speeds.
Verify that each unit can communicate effectively with at least one other unit to maintain network integrity.
Don’t forget to assess placement—poor positioning can block signals and create connectivity issues that mimic a faulty mesh unit.
Testing Each Node Individually to Find Faults
To systematically identify the problematic node, you’ll need to power down your entire mesh network and restart each unit individually.
Begin by turning on just your main router, test your connection speed, then add one node at a time while monitoring performance after each addition.
If you notice a significant speed drop when a specific node comes online, you’ve likely found your faulty unit.
Power Down All Units
Isolating faulty mesh nodes requires a systematic approach that starts with powering down your entire network.
You’ll need to completely shut down every mesh router and node before beginning your diagnostic process. This creates a clean starting point that eliminates interference between units.
Follow these essential steps during shutdown:
- Unplug all mesh units from power sources simultaneously
- Wait at least 30 seconds for complete power discharge
- Document each unit’s location before powering down
Once everything’s offline, you can methodically reactivate each mesh router one at a time.
This isolation technique helps you identify which specific unit causes speed drops or connectivity issues.
You’ll be able to pinpoint problem nodes by observing network performance as each component comes back online.
Test One at Time
Each mesh unit must undergo individual testing to reveal performance bottlenecks and connectivity failures within your network. When you test one at time, disconnect your mesh router from the modem to isolate each unit’s performance. Power on one node, then test connection speed before activating the next unit.
| Test Step | Action Required | Expected Result |
|---|---|---|
| Unit 1 | Power on first node only | Baseline speed measurement |
| Unit 2 | Add second node to network | Speed should maintain/improve |
| Unit 3 | Activate remaining units | No significant speed drops |
Ensure no other devices consume bandwidth during testing. Position each mesh unit correctly so it communicates effectively with at least one neighboring unit. This controlled environment approach helps you identify which specific nodes cause network slowdowns.
Monitor Speed Changes
After establishing your baseline measurements, you’ll need to track performance metrics as each mesh node joins your network. As you power on each unit individually, monitor how the speed of your internet changes with each addition. This systematic approach helps you identify which specific node might be causing network degradation.
During your testing process, pay attention to these critical indicators:
- Significant speed drops when a particular node comes online
- Connection stability issues that coincide with specific units being activated
- Consistent performance patterns that help isolate problematic hardware
Test each mesh unit within reasonable distance from your primary router while maintaining your direct Ethernet connection to the modem. Document speed measurements after each node activation to pinpoint faulty units affecting your network’s overall performance.
Checking Communication Between Mesh Units
One fundamental step in troubleshooting mesh connectivity involves testing communication pathways between your individual units. Start by powering on each mesh unit individually to identify any problematic devices causing connectivity issues. This methodical approach helps pinpoint exactly which unit isn’t functioning properly.
Position your mesh units within range of at least one other unit to maintain strong connections. Closer positioning enhances communication ability, especially when units have direct line of sight to minimize signal interference.
Avoid placing units in enclosed spaces like cupboards, as environmental factors including walls and electronic devices considerably impede signal strength.
Regularly check unit placement to verify adequate spacing without notable obstructions. Your mesh units need clear communication pathways to function effectively and deliver seamless WiFi coverage throughout your space.
Optimal Placement Strategies for Maximum Coverage
Strategic placement of your mesh units determines whether you’ll achieve seamless coverage or frustrating dead zones throughout your home. Position your primary unit centrally to distribute signals evenly across all areas. Each additional unit needs direct line of sight to at least one other unit, maintaining strong interconnection throughout your network.
Key placement strategies include:
- Avoid enclosed spaces – Never place units inside cupboards, closets, or behind large appliances that block wi-fi signals.
- Minimize physical barriers – Position units where walls and furniture won’t greatly impede signal transmission.
- Consider interference sources – Keep units away from electronic devices and thick walls that disrupt network performance.
You’ll maximize coverage by ensuring each unit stays within range of another while avoiding obstacles that weaken signal strength and create connectivity issues.
Moving Units Closer to Your Primary Router
When you’re experiencing weak connections, relocating your mesh units closer to the primary router can dramatically improve signal strength and network stability.
You’ll need to understand ideal distance guidelines to guarantee each unit maintains strong communication without overlapping coverage areas unnecessarily.
Pay attention to your system’s signal strength indicators, as they’ll help you identify the sweet spot where units receive robust signals while still extending coverage to dead zones.
Optimal Distance Guidelines
Although many users scatter their mesh units throughout their homes without considering distance, you’ll achieve excellent performance by positioning your mesh units within 30 feet of your primary router.
Following ideal distance guidelines guarantees your signal strength remains robust and your network performance doesn’t suffer from connectivity drops.
Strategic placement dramatically improves your internet connection quality:
- Maintain direct line of sight between units whenever possible, as walls and furniture can reduce signal strength by up to 50%
- Place mesh units on elevated surfaces like shelves or tables to maximize coverage area and minimize ground-level interference
- Avoid enclosed spaces such as cupboards or closets that trap signals and create dead zones
Regularly evaluate your mesh units’ positioning to guarantee they’re communicating effectively with neighboring nodes.
Signal Strength Indicators
Your mesh units’ signal strength indicators serve as your roadmap to ideal network performance, and relocating units closer to your primary router often provides the quickest fix for weak connectivity.
These visual or app-based indicators display real-time signal quality, helping you identify problematic placements immediately. When you notice weak signals, moving your mesh units closer to the primary router can dramatically improve performance since Wi-Fi signals weaken over distance.
Check your signal strength indicators regularly through your mesh system’s mobile app or LED lights on the units themselves. Look for green or strong signal readings rather than yellow or red warnings.
Position units with clear line-of-sight to your router when possible, avoiding obstacles like walls and large appliances that block signals and reduce overall network effectiveness.
Avoiding Common Placement Mistakes That Block Signals
While mesh WiFi systems offer impressive coverage potential, improper placement can severely undermine their performance and leave you with frustrating dead zones throughout your home.
Your mesh units need strategic positioning to deliver ideal results. Avoid these critical mistakes that’ll sabotage your network’s performance:
- Don’t hide units in cupboards or closets – enclosed spaces create signal blockage that dramatically reduces coverage effectiveness.
- Keep units away from interference sources – microwaves, cordless phones, and other electronics operating on similar frequencies will disrupt your connection.
- Maintain proper spacing between units – placing them too close creates overlapping channels and degrades overall performance.
Position your mesh units in open areas with clear sight lines between devices. Place them closer to your primary router for enhanced communication speed, and maintain adequate distance from electronic appliances that cause interference.
Creating Clear Lines of Sight Between Mesh Nodes
Creating clear lines of sight between your mesh nodes stands as one of the most critical factors in achieving ideal network performance.
You’ll want to position your mesh units in open areas where they can “see” each other without obstruction. Keep large furniture, appliances, and walls from blocking the direct path between nodes. Don’t place units inside cupboards, closets, or other enclosed spaces that’ll weaken your signal strength.
Mount your mesh nodes on walls or elevated surfaces to create better clear lines of sight throughout your home. This higher positioning expands coverage areas while reducing interference.
Remember to maintain two to three rooms’ distance between units – this prevents signal degradation while ensuring peak connectivity across your entire network.
Environmental Factors That Interfere With Wi-Fi Signals
Beyond proper positioning, numerous environmental factors can sabotage your mesh network’s performance even when you’ve established clear lines of sight between nodes.
Physical barriers pose the biggest threat to your wi-fi network. Concrete walls, metal appliances, and brick structures dramatically weaken signals as they pass through.
Concrete, metal, and brick act like fortress walls against your wifi signal, turning strong connections into frustratingly weak transmissions.
Even furniture placement can create dead zones in your coverage area.
Electronic interference compounds these problems:
- Household devices – Microwaves, cordless phones, and baby monitors regularly disrupt 2.4 GHz frequencies
- Competing networks – Neighboring wi-fi networks create congestion, especially in apartments and dense neighborhoods
- Natural obstacles – Thick vegetation and large water features absorb and reflect radio waves
You can minimize interference by adjusting your mesh units’ antenna orientation and switching to less crowded channels when possible.
When to Replace Vs Repair Problematic Mesh Hardware
When troubleshooting doesn’t resolve your mesh network issues, you’ll face a critical decision: should you repair the problematic hardware or replace it entirely?
If one mesh unit consistently delivers slower speeds than others, it’s likely experiencing hardware failure and needs replacement. Units several years old may lack support for current Wi-Fi standards, making upgrades beneficial for enhanced performance.
Frequent disconnections or inability to connect with other network units signal hardware breakdown, making replacement more practical than extensive troubleshooting.
When units show performance degradation over time and don’t respond to fixes, replacement becomes the efficient solution.
If your mesh unit remains under warranty while exhibiting problems, contact the manufacturer for replacement rather than attempting repairs yourself.
Frequently Asked Questions
Why Does My Mesh Wifi Keep Disconnecting?
Your mesh WiFi disconnects due to performance declines, interference from other devices, poor unit placement, or faulty hardware. Environmental obstructions and overcrowded channels also cause frequent drops in your network connection.
How Do I Improve My Mesh Connection?
You’ll improve your mesh connection by positioning units within direct line of sight, restarting them sequentially, testing each individually, ensuring ideal placement within range, and using wired connections to isolate issues.
Why Is My Mesh Wifi so Bad?
Your mesh WiFi’s probably struggling because units are placed too far apart, there’s interference from other devices, your internet connection itself is slow, or one of the mesh units is faulty.
Why Is My Mesh Network Unstable?
Your mesh network’s unstable because you’ve got too many connected devices, faulty units, poor placement between nodes, or environmental interference from walls and electronics blocking signals between mesh points.


Leave a Reply