Building your own voice-activated smart thermostat starts with selecting a microcontroller (Arduino or Raspberry Pi), temperature sensors, and a Wi-Fi module like ESP32. After safely wiring to your HVAC system, program voice commands for temperature control, scheduling, and mode changes. Integrate with Google Assistant or Alexa using their APIs, and implement energy-saving features like geofencing and usage reports. The step-by-step guide below will transform you from DIY beginner to smart home expert.
Essential Components and Hardware Selection

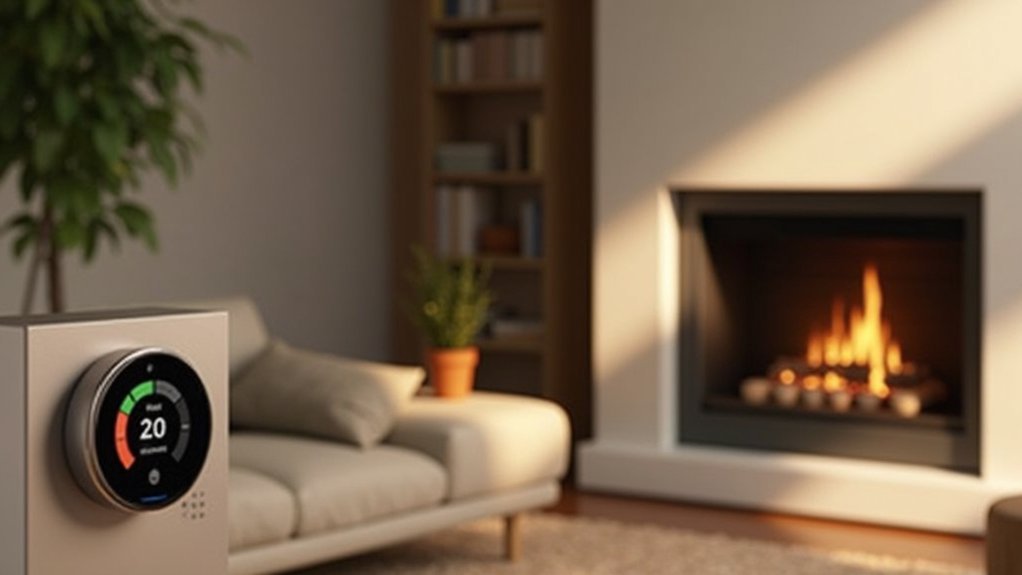
Building your own smart thermostat requires five key electronic components to form its foundation.
Start with a microcontroller like Arduino or Raspberry Pi to serve as the brain of your system. You’ll need temperature and humidity sensors to monitor your home’s climate conditions accurately.
The heart of any DIY smart thermostat begins with a microcontroller and precise environmental sensors to track your home’s conditions.
For voice control capabilities, incorporate a voice module such as Google Assistant or Amazon Alexa, paired with quality microphone arrays and noise cancellation technology. This approach allows you to achieve built-in voice assistants similar to the ecobee Smart Thermostat Premium.
Don’t forget a Wi-Fi module (ESP32 or ESP8266) to enable internet connectivity and smart home integration. This allows your thermostat to communicate with other devices via Zigbee, Z-Wave, or directly through smart home hubs.
Finally, make certain you’ve implemented a reliable power supply—consider hardwired connections for stability and include energy monitoring modules to track consumption.
Step-by-Step Wiring and Installation Guide
Installing your DIY smart thermostat requires careful attention to wiring and proper mounting techniques. Before you begin, turn off power at the breaker and use a voltage tester to confirm the system is de-energized.
Remove your old thermostat carefully, taking photos of the existing wiring configuration. Label each wire as you disconnect it using the provided stickers. The C-wire is essential for powering your smart thermostat; if it’s absent, you’ll need a power extender kit.
Connect wires to matching terminals on your new thermostat base (R, G, Y, W), ensuring secure connections. For heat pump systems with auxiliary heating, you’ll need to follow specific configurations detailed in the wiring diagrams.
Mount the base level on your wall, tucking excess wires neatly inside. Attach the thermostat body, restore power, and test all functions through your control interface to verify proper operation.
Programming Your Voice Recognition System

You’ll need to set up your voice recognition system by first creating a basic command library with essential phrases like “set temperature to 72 degrees” or “turn on fan.”
Incorporate accent adaptability by training your system with multiple voice samples from different speakers, ensuring the thermostat responds accurately regardless of pronunciation variations.
Don’t forget to implement a wake phrase like “Hello, thermostat” that activates the listening mode without triggering false commands. For enhanced functionality, consider integrating with popular voice assistants as many modern thermostats like the AprilAire models are compatible with Alexa and Google Assistant.
Programming Your Voice Recognition System
Once you’ve assembled the hardware components for your smart thermostat, programming the voice recognition system becomes your next critical task.
Start by configuring your microphone array with noise cancellation to improve command accuracy in varied environments.
Implement the pre-processing stage for audio normalization and background noise reduction.
For the voice engine, you’ll need to choose between offline processing for enhanced privacy or cloud-based solutions for broader vocabulary support. Most DIY systems achieve around 95% accuracy in quiet settings.
Set up user enrollment to personalize recognition and implement authentication features for critical commands. The system should utilize far-field voice-control technology similar to Honeywell’s RTH9590WF1011 model to ensure it can detect commands even in busy household environments.
Don’t forget to program error handling routines for misrecognized instructions. Your system should include continuous learning capabilities, allowing it to adapt to your accent and command preferences over time.
Voice Command Library
A thorough voice command library forms the foundation of any effective smart thermostat system. When building yours, categorize commands into temperature control, mode switching, scheduling, and status inquiries to maintain organization and efficiency.
Structure your library with these essential components:
- Intent categories – Separate commands by function (temperature adjustment, mode changes, scheduling) to streamline recognition processing and improve response times.
- Command variations – Include multiple phrasings for each function (“set to 72” or “change temperature to 72”) to accommodate different speaking styles.
- Feedback responses – Program confirmation messages that verify successful command execution, enhancing user confidence in your system.
Keep commands concise and use consistent terminology throughout your library to minimize recognition errors and create a seamless user experience. Consider implementing routines that allow for multiple devices to be controlled with a single voice command for enhanced convenience in your smart home environment.
Handling Different Accents
Building on your voice command library, the next challenge is accommodating diverse speech patterns in your smart thermostat system. Implement accent classification to identify user accents before processing commands, allowing your system to apply customized transcription rules for each accent.
Consider these effective approaches:
- Train your model with accent-rich datasets representing your target users
- Implement acoustic model adaptation techniques for efficiency
- Use multi-speaker embeddings (x-vectors or d-vectors) to capture accent-specific features
- Enable real-time adaptation that adjusts to individual speech patterns
For users with strong accents, incorporate accent translation features that modify pronunciation to standardized forms. Research shows speech recognition systems typically have 16-20% higher error rates for non-native accents compared to standard ones.
Test your system with diverse speakers regularly to identify and address bias, ensuring your smart thermostat works reliably for everyone in your household.
Configuring Smart Features and Energy Management
Configuring smart features and energy management represents the most essential phase in creating your DIY thermostat system.
The intelligent brain of your DIY thermostat system lives in its smart features and energy optimization capabilities.
You’ll want to implement algorithms that analyze temperature data, occupancy patterns, and local weather forecasts to optimize energy usage while maintaining comfort.
- Program geofencing capabilities that automatically adjust temperatures when you’re away, saving energy without sacrificing comfort when you return home.
- Create customized scheduling options that align with your daily routines—setting different parameters for weekdays versus weekends.
- Develop a reporting system that tracks your energy consumption over time, helping you identify additional opportunities for efficiency improvements.
Don’t forget to include over-the-air update functionality to guarantee your DIY thermostat continually improves with new energy-saving algorithms and features you’ll develop in the future. Implementing advanced learning algorithms will allow your system to automatically adjust temperatures based on your behavior patterns, reducing the need for manual programming as time passes.
Connecting With Popular Voice Assistant Platforms
Once your smart thermostat’s core functionality and energy management features are in place, you’ll want to extend its capabilities through voice assistant integration.
Most DIY projects can connect with Google Assistant, Amazon Alexa, or Apple Siri, depending on your existing smart home ecosystem.
For Google Home integration, leverage their available APIs to enable natural language commands for temperature control and scheduling.
If you’re an Apple user, focus on HomeKit compatibility to control your thermostat through Siri on your iPhone or HomePod.
Alexa users can create custom skills that allow for voice-activated routines and notifications.
Each platform offers developer tools to help you implement secure voice control. The integration process supports remote monitoring capabilities that allow you to check and adjust your HVAC system from anywhere.
Consider which assistant you use most frequently, as this will determine the integration path for your project.
Troubleshooting and Performance Optimization
Building your own smart thermostat won’t be without challenges, particularly with connectivity and voice recognition systems.
When your thermostat loses Wi-Fi connection, check your router signal strength and restart both devices to restore functionality. Make sure to position your DIY thermostat away from heat sources that could interfere with accurate temperature readings.
If voice commands fail to register, make sure you’ve activated voice control during setup and that your commands match the proper syntax recognized by your chosen voice assistant platform.
Troubleshooting and Performance Optimization
Even the most carefully constructed smart thermostat can encounter issues that affect its performance and efficiency.
When building your own system, you’ll need to develop troubleshooting skills to maintain peak functionality and prevent energy waste.
1. Clean hardware regularly – Dust accumulation on sensors can cause inaccurate temperature readings.
Place your thermostat away from drafts, direct sunlight, and heat sources to guarantee proper sensing.
2. Keep firmware updated – Outdated software leads to missing features and security vulnerabilities.
Make sure your Wi-Fi connection remains stable to prevent connectivity gaps that disrupt remote adjustments.
3. Test voice commands thoroughly – Misinterpreted commands can trigger incorrect temperature changes.
When creating automation routines, check for logical errors that might cause delayed or skipped adjustments.
Integrating geofencing capabilities into your DIY thermostat can dramatically improve energy efficiency by automatically adjusting temperatures based on your location.
Common Connection Issues
Four common connection problems can plague your DIY smart thermostat, regardless of how well you’ve built the hardware.
First, weak Wi-Fi signals (below 75% strength) will cause intermittent connectivity failures. Position your thermostat closer to your router or install extenders to maintain stable connections.
Second, device synchronization issues often arise when voice assistants lose their link to your thermostat. If commands stop working, try re-linking your thermostat in the controlling app. Many users encounter error messages like “doesn’t support that functionality” when attempting to control their thermostats with voice commands.
Third, firmware incompatibilities between your thermostat and voice assistants can break functionality after updates. Keep all devices updated to minimize these conflicts.
Finally, network configuration problems—particularly security settings, different subnets, or frequency band mismatches—can prevent proper communication. Confirm your thermostat, mobile device, and voice assistants all connect to the same network configuration.
Voice Recognition Failures
While network connectivity forms the foundation of your smart thermostat’s capabilities, voice recognition adds the layer of convenience that truly makes it “smart.”
Voice recognition failures can frustrate even the most patient DIY enthusiasts, often leaving you repeating commands with increasing volume and irritation.
When troubleshooting voice recognition issues, focus on:
- Setup validation – Confirm you’ve activated voice control during initial setup and accepted the Device Usage Agreement. Without this essential step, your thermostat won’t respond to voice commands.
- Environmental optimization – Position your thermostat away from noisy appliances and add acoustic treatments like rugs to reduce echo in hard-surfaced rooms. For some users, deleting custom temperature presets has resolved persistent voice command issues.
- System maintenance – Keep firmware updated, check for microphone obstructions, and verify Wi-Fi connectivity remains stable to guarantee reliable voice command processing.
Frequently Asked Questions
How Much Money Can I Save Compared to Commercial Smart Thermostats?
You’ll save $50-250 upfront with DIY vs. commercial smart thermostats. While commercial units save 8-10% annually on heating/cooling costs, your DIY version can approach similar savings with proper customization and smart features.
Can My DIY Thermostat Work During Power or Internet Outages?
Your DIY thermostat can work during outages with battery backup for basic functions, but you’ll lose smart features during power loss. During internet outages, you’ll retain local control but won’t have remote access.
What Security Measures Protect Against Unauthorized Voice Commands?
To protect against unauthorized voice commands, you’ll need voice authentication, encryption, multi-factor verification, and physical security features. You can also disable voice control when not needed and regularly update your voice profiles.
How Do I Integrate Solar Panels or Alternative Energy Sources?
You can integrate solar panels by connecting your thermostat to inverters through HEMS using Z-Wave or Wi-Fi protocols. Set up automation rules that adjust heating/cooling during peak solar production to maximize your self-consumption and reduce grid dependency.
Is Programming Knowledge Required for Basic Voice Control Functionality?
For basic voice control functionality, you don’t need extensive programming knowledge. Most voice-activated thermostats connect to existing assistants like Alexa or Google Home through user-friendly apps with simple setup procedures.
In Summary
You’ve now built a fully customized voice-activated thermostat that’s tailored to your specific needs. By controlling your home’s climate with simple voice commands, you’ll enjoy enhanced comfort while potentially reducing your energy bills. Don’t stop here—continue exploring new features and integrations to expand your smart home ecosystem. The skills you’ve developed will serve you well in future DIY electronics projects.


Leave a Reply