
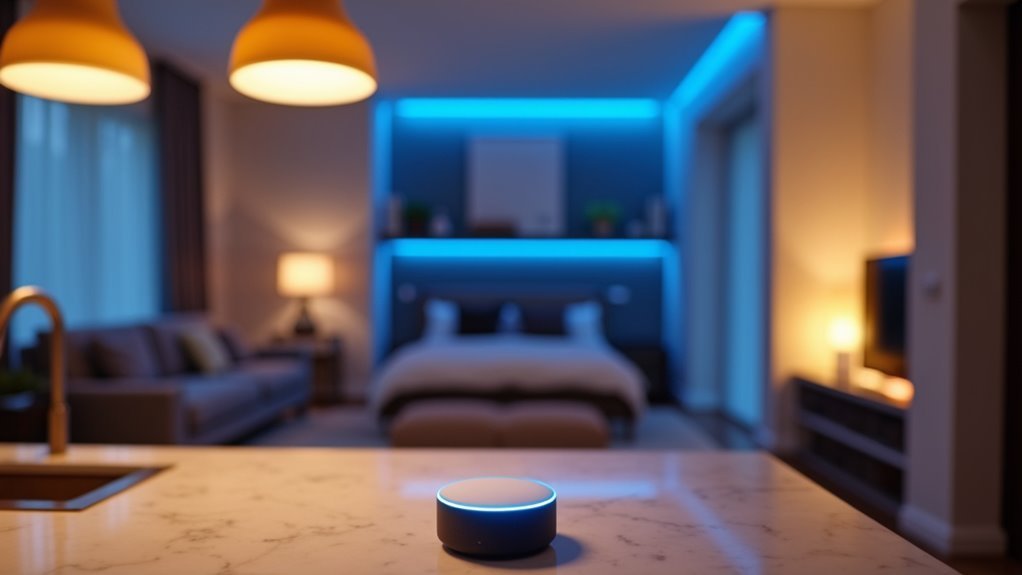
You’ve probably experienced the frustration of fumbling for light switches in the dark or manually adjusting multiple bulbs to create the perfect atmosphere. Voice-activated lighting scenes eliminate this hassle by letting you transform any room’s ambiance with simple spoken commands. Whether you’re hosting a dinner party, settling in for movie night, or winding down for bed, the right voice-controlled setup can instantly set the mood—but only if you know the essential configuration steps that most people miss.
Select and Configure Your Voice Recognition Module

Before diving into your voice-activated lighting project, you’ll need to choose the right voice recognition module for your specific requirements.
Consider popular options like the Elechouse Voice Recognition Module V3 or the Grove Speech Recognizer, carefully evaluating features such as command storage capacity and assembly requirements.
You’ll need to decide between speaker-independent or speaker-dependent systems, as this choice directly affects complexity and installation processes.
Make certain your selected voice recognition module is fully compatible with your Arduino microcontroller and has suitable interfaces for connecting to your appliances.
Consider the microphone type – built-in microphones offer simplicity, while external ones provide better sound quality in noisy environments.
Assess potential background noise impacts on performance, as this can greatly affect the reliability of voice commands recognition in your lighting scenes.
Program Custom Voice Commands for Scene Activation
Once you’ve configured your voice recognition module, you’ll program custom voice commands that activate your lighting scenes.
Smart speakers like Amazon Alexa or Google Assistant enable you to create personalized phrases such as “Activate Movie Night” or “Set the Dinner Ambiance.” Configure these commands to trigger multiple actions simultaneously—dimming lights, changing colors, and adjusting shades for enhanced experiences.
Voice control systems require specific keywords or phrases that you’ll need to memorize for effective operation.
Integration with smart home hubs like Lutron or Crestron guarantees seamless communication between your commands and lighting scenes, providing reliable performance.
Testing and fine-tuning your voice commands is essential.
This process guarantees your system accurately recognizes and responds to requests, minimizing errors and improving satisfaction. Adjustments help maintain ideal functionality.
Create Room-Specific Lighting Groups and Controls
Guarantee each light bulb within your groups is compatible with your chosen voice assistant for seamless control and enhanced user experience.
Regularly test voice commands in each room to confirm assigned nicknames and groupings respond accurately in real-world scenarios.
Consider background noise and microphone placement when configuring room-specific controls to optimize command recognition and responsiveness for reliable performance.
Set Up Mood-Based Scene Configurations
Since the right lighting can instantly transform your space’s atmosphere, mood-based scene configurations let you create pre-programmed settings that match specific activities or emotions. Your lighting automation system can group lights together, adjusting brightness and color temperatures for different purposes like relaxation or focused work sessions.
| Scene Type | Configuration |
|---|---|
| Relaxation | Warm, dimmed lights |
| Focus | Bright, cool white |
| Movie Night | Minimal ambient lighting |
| Dinner Party | Soft, warm glow |
Voice controlled activation makes these scenes instantly accessible through Amazon Alexa or Google Assistant integration for seamless hands-free operation. You can program custom scenes to simultaneously adjust multiple smart devices, dimming lights while playing ambient music for enhanced atmospheric effects throughout your entire home space. Experiment with different color combinations and intensities to create truly personalized experiences that cater to your individual preferences and effectively enhance your space’s overall mood for various special occasions perfectly.
Install and Wire Smart Switches With Iot Relays

You’ll transform your traditional wall switches into smart controls by installing IoT relays that enable voice-activated lighting scenes.
The wiring process requires connecting the relay’s Normally Open and Common terminals to manage multiple circuits while maintaining proper electrical flow.
You must follow essential safety protocols by shutting off power and confirming compatibility with your existing electrical system before starting installation.
IoT Relay Wiring
IoT relays transform standard light switches into intelligent components that’ll respond to voice commands and remote control when properly wired.
When tackling IoT relay wiring, you’ll connect the Normally Open (NO) terminal to your load, such as a light fixture, while linking the Common (COM) terminal to your power source. This configuration guarantees proper functionality for your smart lighting setup.
Use appropriate 18-22 AWG wire gauge to handle current loads without overheating risks. Safety’s absolutely paramount—always turn off your power supply and double-check all connections before proceeding with installation work.
Once you’ve completed the wiring process, you can program your relay to integrate seamlessly with Amazon Alexa, enabling voice-controlled lighting scenes that respond instantly to your spoken commands throughout your entire smart home automation system.
Electrical Safety Protocols
When working with smart switches and IoT relays, electrical safety protocols must take priority over convenience and speed. You’ll need to always turn off power at the circuit breaker before beginning installation to prevent electric shock hazards.
Use properly rated tools when handling high-voltage wires and follow local electrical codes throughout the process.
When connecting IoT relays, correctly identify the Normally Open (NO) and Common (COM) terminals to avoid dangerous malfunctions. Guarantee all wire connections are secure and properly insulated using heat-shrink tubing or electrical tape to prevent short circuits and electrical fires.
After completing installation, test the functionality of your smart switches and IoT relays. These electrical safety protocols aren’t optional—they’re essential for protecting yourself and your property while creating voice-activated lighting scenes.
Integrate Voice Assistants for Seamless Control
Since traditional switches limit you to basic on-off functionality, voice assistants access smart lighting’s full potential through intuitive spoken commands. You can integrate Amazon Alexa or Google Assistant with your lighting system to make hands-free control effortless.
Create custom voice commands that trigger specific scenes like “Movie Night” or “Dinner Time,” eliminating manual adjustments entirely. Your smart lighting setup supports multiple voice commands, letting you control individual lights, groups, or entire rooms simultaneously.
Custom voice scenes like Movie Night eliminate manual lighting adjustments while controlling individual lights or entire rooms effortlessly.
You’ll program assistants to respond to personalized phrases, improving responsiveness and creating more natural interactions. Alexa and similar platforms integrate seamlessly with broader smart home ecosystems, enabling synchronized control of lighting alongside thermostats and security systems.
This thorough integration transforms your living space into a truly responsive environment where spoken words instantly adjust your home’s ambiance and functionality.
Test Voice Command Reliability Across Different Distances
Testing your voice commands from multiple distances reveals critical performance gaps you’ll need to address before relying on your smart lighting system.
Start by positioning yourself at one meter, three meters, and five meters from your microphone to establish baseline performance data. You’ll notice voice recognition accuracy typically drops as distance increases, making closer positioning more reliable for complex commands.
Test different command phrases since some combinations work better than others due to pronunciation variations and complexity.
Background noise considerably affects your system’s ability to detect voice inputs, so evaluate performance in quiet environments versus rooms with ambient sound.
Compare built-in microphones against external options, as dedicated microphones provide superior sensitivity and range.
Calculate success percentages at each distance and noise level to identify specific improvement areas needed.
Configure Wake Words and Trigger Phrases
Choose trigger phrases that clearly communicate your desired lighting actions effectively.
You should establish consistent naming conventions for rooms and scenes to avoid confusion when issuing voice commands.
Test your wake words and trigger phrases across different environments and noise levels to identify potential recognition issues.
Thorough testing in various conditions guarantees your voice commands work reliably regardless of environmental challenges.
This thorough testing process guarantees your voice commands work reliably regardless of background sounds or distance from your smart device system.
Design Time-Based Scene Automation
Beyond manual voice control, time-based automation transforms your lighting system into a proactive assistant that anticipates your needs throughout the day.
You can set specific times for lighting adjustments, automatically turning lights on or off according to predetermined schedules for enhanced convenience. Smart home platforms let you create routines that link time-based triggers to lighting scenes, dimming lights at sunset or brightening them during morning hours.
You’ll customize scenes for various times of day, creating the desired ambiance for different activities or moods.
Advanced systems integrate with external data like sunrise and sunset times, automatically adjusting lighting scenes based on seasonal changes.
Enhance your experience by combining time-based automation with voice control, allowing commands like “turn on movie night” to activate predefined scenes at specific times.
Troubleshoot and Optimize Voice Recognition Performance
When your voice-activated lighting scenes aren’t responding reliably, you’ll need to address recognition accuracy issues that stem from poor hardware setup and environmental interference.
Start by repositioning your microphone away from noise sources and testing command detection at different distances to find the ideal placement.
You can then fine-tune sensitivity settings to reduce false positives while ensuring your system responds consistently to intended voice commands.
Fix Recognition Accuracy
Poor voice recognition accuracy can frustrate users and undermine the effectiveness of your lighting automation system.
You’ll need to address several key factors to improve recognition accuracy and guarantee reliable voice commands.
Position your speech recognition module in a location that’s away from background noise sources. Ambient sounds interfere with command clarity and reduce system performance.
Next, invest in a high-quality microphone that captures wider frequency ranges and minimizes distortion.
Train your voice recognition module using command variations and different accents to increase adaptability across speakers.
Also keep firmware updated regularly to benefit from improved voice processing algorithms.
Finally, implement a feedback system that allows users to confirm or correct commands. This enables your system to learn from mistakes and continuously improve recognition performance.
Optimize Hardware Setup
Since hardware configuration directly impacts recognition reliability, you’ll need to optimize your system’s critical components for consistent performance.
Start by selecting a high-quality microphone and positioning it strategically to minimize background noise interference effectively. Your voice recognition module should support multiple command storage while distinguishing between different speakers’ voices effectively.
Optimize your Arduino and relay components’ power supply and connectivity to prevent interruptions during command execution consistently.
Regular testing and recalibration in your intended environment helps adapt to changing noise levels and speaker distances over time.
Implement a simple naming scheme for your lighting scenes and devices—this reduces user confusion and improves command accuracy considerably.
Your properly optimized hardware setup ultimately determines whether your voice recognition system responds reliably or struggles with various inconsistent performance issues throughout operation.
Reduce Environmental Interference
Environmental interference will undermine your refined hardware setup unless you actively address noise sources that compromise voice recognition accuracy. Environmental noise from air conditioning units and household appliances consistently disrupts your system’s ability to process voice commands effectively and reliably throughout the day.
Position your microphones strategically away from these noise sources while maintaining ideal height and distance from users. Sound-absorbing materials like carpets and curtains minimize echoes and reverberations that confuse voice recognition systems during daily operation.
| Interference Source | Solution |
|---|---|
| Air conditioning units | Position microphones away from HVAC |
| Appliances | Maintain distance from kitchen devices |
| Echo/reverb | Install carpets and curtains |
| Outdated software | Regular algorithm updates |
| Untested conditions | Test various room configurations |
Regular software updates guarantee you benefit from improved noise-filtering algorithms designed to enhance overall system accuracy levels. Test your voice commands under different room conditions and configurations to identify potential environmental interferences that could compromise your system’s overall responsiveness and performance levels effectively.
Frequently Asked Questions
How to Make a Voice-Controlled Light?
You’ll select a compatible smart lighting system or use Arduino with a speech recognition module. Connect a relay to your light fixture, train specific voice commands, and test consistently in various environments for ideal reliability.
How to Make Sound Controlled Lights?
You’ll connect sound sensors to lighting controllers, program specific sound patterns like clapping or voice commands, then integrate with smart home platforms. Adjust sensitivity settings and test different audio frequencies so your lights respond properly.
How Do I Automate My House Lights?
You’ll need a smart lighting system like Philips Hue, connect it through a smart hub, download the associated app to create schedules and lighting scenes, then set up automated routines for different times and activities.
How to Make Voice Controlled LEDS Using Arduino?
You’ll connect a speech recognition module to your Arduino, wire an IoT relay to control LED power, upload training code for voice commands, then program the Arduino to respond by switching LEDs on or off.


Leave a Reply