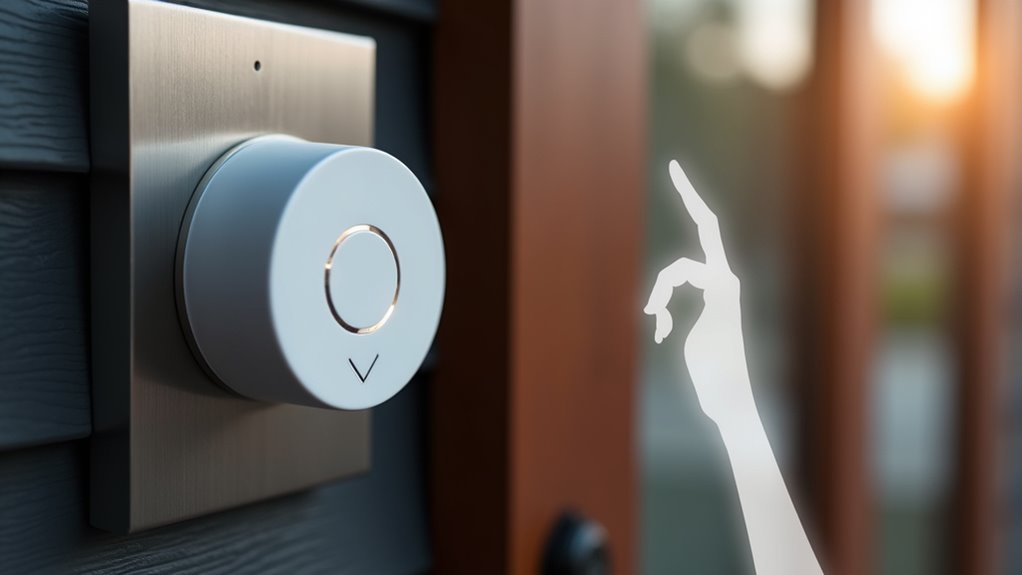
You’re tired of complicated installations that damage your walls and require expensive tools you’ll never use again. Setting up a no-drill wireless doorbell offers the perfect solution, but there’s a specific sequence you must follow to guarantee your doorbell stays securely mounted and functions reliably for years. Skip even one essential step in the preparation process, and you’ll find yourself dealing with a doorbell that falls off at the worst possible moment.
Benefits of No-Drill Installation Methods
When you’re installing a wireless doorbell, no-drill methods offer significant advantages that protect your home’s structure and save you money.
No-drill installation preserves wall integrity by eliminating holes that can cause damage and require costly repairs later. You’ll find these methods incredibly convenient if you’re renting or move frequently, as they simplify doorbell removal and relocation without leaving marks behind.
Strong adhesive strips and specialized doorbell mount options provide secure attachment without requiring any tools. You won’t need to worry about surface damage since these mounts can be applied and removed cleanly.
The versatility is another major benefit – most no-drill systems work with various doorbell models, accommodating your specific preferences while maintaining the same protective advantages for your walls.
Choosing the Right Mounting Surface
Three key factors determine whether your no-drill wireless doorbell will stay securely mounted: surface texture, cleanliness, and dimensions. You’ll need a smooth, even surface that allows the adhesive tape to bond effectively with your mounting bracket. Clean the area thoroughly before installation to remove dirt, dust, or oils that could weaken the adhesive’s grip.
| Surface Type | Recommended |
|---|---|
| Painted wood/metal | ✓ Yes |
| Smooth plastic | ✓ Yes |
| Glass | ✗ No |
| Rough brick/stone | ✗ No |
Check that your chosen location provides adequate surface dimensions of 5 inches by 2.5 inches for proper mounting bracket placement. Avoid glass surfaces, which can’t provide sufficient stability. Confirm the area’s free from obstructions that might interfere with your doorbell’s visibility and functionality.
Essential Tools and Materials Needed
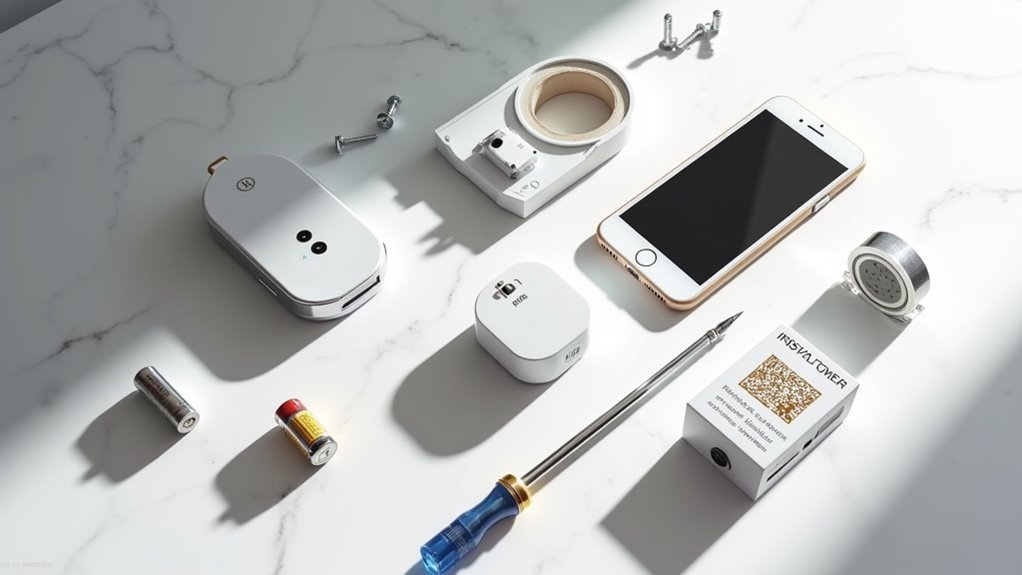
Most no-drill wireless doorbell installations require just a handful of basic materials you likely already have at home.
You’ll need double-sided adhesive tape specifically designed for secure attachment to smooth surfaces. This tape is essential for mounting your doorbell without drilling into walls or door frames.
Grab a clean cloth or surface cleaner to prepare the installation area, as proper surface preparation guarantees the adhesive’s effectiveness.
The beauty of this setup is that no power tools are required, making it accessible for everyone.
If you’re using a no-drill mount, verify your doorbell’s compatibility with the mount specifications, particularly door thickness requirements between 0.59 to 2.36 inches.
While optional, having a level handy helps guarantee straight installation.
Adhesive Mount Installation Process
You’ll need to start with proper surface preparation to guarantee your adhesive mount creates a strong, lasting bond with your wall.
Clean the mounting area thoroughly and verify it’s completely smooth before removing the protective strips from the adhesive tape.
The application technique requires you to press firmly and hold the mount in place for at least five minutes to activate the adhesive properly.
Surface Preparation Steps
Four key factors determine successful adhesive mounting: surface texture, cleanliness, positioning, and curing time. Proper surface preparation directly impacts adhesive effectiveness and guarantees your wireless doorbell installation remains secure for years.
Begin by selecting a smooth, even mounting location. You’ll want to avoid rough surfaces like brick or shingles, as they prevent proper adhesion. Glass surfaces also aren’t recommended for best results.
Follow these essential preparation steps:
- Clean the chosen area thoroughly, removing dirt, dust, and any obstructions.
- Verify adequate visibility and accessibility for daily doorbell operation.
- Remove protective strips from the adhesive tape completely.
- Press the mount firmly against the surface for five minutes, then allow one hour for full curing.
This methodical approach assures maximum adhesive effectiveness during installation.
Adhesive Application Technique
Three critical moments during adhesive application will determine your doorbell’s long-term stability: initial contact, pressure maintenance, and curing patience. Start by removing the protective strips from your adhesive tape completely. Position the mount against your prepared mounting surface and press firmly.
| Step | Action | Duration | Result |
|---|---|---|---|
| 1 | Remove protective strips | 30 seconds | Exposed adhesive |
| 2 | Press mount to surface | Immediate | Initial contact |
| 3 | Maintain firm pressure | 5 minutes | Secure attachment |
| 4 | Allow curing time | 1 hour | Full adhesion |
Don’t release pressure prematurely during the five-minute hold period. This guarantees proper bonding between the adhesive and your mounting surface. After maintaining pressure, wait one full hour before testing your doorbell’s stability for ideal adhesive application results.
Magnetic Mount Setup Instructions
Magnetic mounts provide the simplest installation method for wireless doorbells, requiring no tools, screws, or permanent modifications to your walls.
These No-Drill solutions work perfectly with your Ring Video Doorbell and other models, offering maximum flexibility for renters and temporary installations.
Before attaching your magnetic mounts, clean the mounting surface thoroughly to remove dirt, dust, and debris.
A smooth, obstruction-free surface guarantees ideal adhesion and stability.
- Check dimensions: Verify your doorbell fits within 2.55″ W x 5.11″ H x 1.14″ D specifications
- Surface preparation: Use alcohol wipes to clean mounting area completely
- Position carefully: Align mount at ideal viewing height and angle
- Test regularly: Inspect magnetic connection strength, especially in high-traffic areas
You can easily relocate your doorbell anytime without damaging surfaces.
Door Edge Mount Configuration
Door edge mounts offer an innovative solution for inward-swinging doors, accommodating door thicknesses from 0.6 to 2.3 inches without requiring any drilling or permanent hardware.
You’ll find this no-drill system works with various wireless doorbell models, including all Ring and Blink versions through its adjustable holder design.
Installation couldn’t be simpler—you don’t need any tools. Just position your doorbell camera in the mount compatible holder and adjust the clip until it’s secure.
Tool-free installation takes just seconds—simply place your doorbell camera in the holder and adjust the clip for a secure fit.
The anti-theft feature prevents removal unless you open the door, keeping your device safe while preserving motion sensor functionality. Built-in vents promote ideal performance and longevity.
The sleek design makes this perfect for temporary residences, allowing easy removal without surface damage.
Suction Cup Mount Application
You’ll need to prepare your mounting surface properly before applying the suction cup to guarantee maximum adhesion and stability.
Once you’ve cleaned and dried the area, you can attach the mount using specific techniques that optimize grip strength.
Regular maintenance checks will help you monitor the mount’s durability and address any weakening before your doorbell becomes unstable.
Surface Preparation Requirements
Success with your wireless doorbell’s suction cup mount depends entirely on proper surface preparation. You’ll need to create ideal conditions for maximum adhesion before installing your device.
Start by thoroughly cleaning the mounting area to remove all dust, dirt, and grease. These contaminants greatly reduce your suction cup’s grip strength.
Next, verify the surface is completely smooth and even, as rough or uneven textures will prevent proper contact.
Essential surface preparation steps include:
- Clean thoroughly – Remove all debris and oils using appropriate cleaning solutions
- Verify smoothness – Check for bumps, scratches, or texture that could compromise adhesion
- Confirm temperature range – Verify surface temperature falls within manufacturer specifications
- Clear obstructions – Remove anything blocking proper placement or doorbell visibility
Avoid glass surfaces entirely, as your suction cup mount isn’t designed for such materials.
Proper Attachment Technique
Three critical steps will determine whether your suction cup mount creates a reliable, long-lasting attachment.
First, lightly moisten the suction cup with water to enhance its grip on the surface. This simple step greatly improves adhesion strength and helps create a secure attachment.
Next, position the suction cup against your prepared surface and press it firmly into place. Apply even pressure across the entire cup to eliminate air pockets that could weaken the hold.
Finally, push down the center mechanism to create a vacuum seal for maximum stability. You’ll hear or feel the suction engage, confirming proper installation.
This vacuum seal is essential for maintaining your doorbell’s position, especially during temperature changes that can affect suction strength over time.
Durability and Maintenance
Longevity of your suction cup doorbell mount depends on consistent care and environmental awareness.
You’ll need to monitor several factors that directly impact your mount’s durability and performance over time. Environmental conditions play a significant role in suction cup maintenance. Extreme temperatures and moisture can compromise adhesion, causing your doorbell to slip or fall.
You should inspect the mounting surface regularly and clean it to preserve ideal grip strength.
Key maintenance practices include:
- Clean the surface weekly with a damp cloth to remove dirt and oils
- Check adhesion monthly by gently testing the mount’s stability
- Reposition during temperature extremes to prevent seal deterioration
- Avoid high-traffic areas where accidental contact could dislodge the mount
Consistent maintenance guarantees reliable doorbell operation.
Hook and Loop Fastener Attachment
Hook and loop fasteners offer one of the most versatile mounting solutions for your wireless doorbell, combining strong adhesion with the flexibility to reposition as needed.
This attachment method works exceptionally well on smooth, clean surfaces and delivers reliable grip that withstands moderate outdoor conditions.
To install, attach one fastener side to your wall and the corresponding side to your doorbell, ensuring a snug fit for peak performance.
You’ll find these fasteners compatible with most wireless doorbells, making them an excellent alternative to adhesive strips or traditional mounts.
Remember to regularly inspect the attachment, particularly in high-traffic areas, to verify the adhesive remains strong and your doorbell stays securely mounted.
Wireless Signal Range and Placement
Where you position your wireless doorbell directly impacts its performance and reliability. Most wireless doorbells deliver effective wireless signal range between 100-300 feet under ideal conditions. However, your placement strategy determines actual performance since walls and furniture create interference that reduces signal strength.
Consider these placement guidelines for optimal functionality:
- Position the doorbell at least 3-5 feet away from Wi-Fi routers and other 2.4 GHz devices
- Choose open areas without heavy obstacles blocking the signal path
- Avoid crowded electronic environments that create frequency interference
- Test signal strength at various distances before final installation
Since most wireless doorbells operate on crowded 2.4 GHz frequency, strategic placement becomes essential.
Regular testing helps you identify the sweet spot where your doorbell maintains consistent communication with its receiver throughout your home.
Chime Unit Setup and Pairing
Once you’ve positioned your chime unit in the ideal location within range of your doorbell button, you’ll need to complete the pairing process to establish communication between the devices.
Start by locating the pairing button on your chime unit and follow the specific button sequence outlined in your manufacturer’s instructions.
After successful pairing, you can adjust the volume settings to your preferred level for daily use.
Chime Placement Location
When selecting the ideal spot for your chime unit, you’ll need to balance several key factors to guarantee peak performance. Your doorbell’s wireless signal must reach the chime reliably, so stay within the manufacturer’s specified range. Most units work effectively up to 1000 feet in open areas, but walls and obstacles can reduce this distance considerably.
Consider these essential placement guidelines:
- Position the chime in high-traffic areas like living rooms or hallways where you’ll hear it clearly.
- Keep the unit away from furniture or thick walls that might muffle the sound.
- Provide adequate clearance around the chime for best audio projection.
- Choose locations with easy access for battery maintenance if your unit isn’t hardwired.
Proper placement guarantees you’ll never miss visitors at your door.
Pairing Button Process
After positioning your chime unit in the ideal location, you’ll need to establish communication between your doorbell button and chime through the pairing process. Start by ensuring both your wireless doorbell components are properly powered and within close range.
| Step | Action |
|---|---|
| 1 | Press and hold the pairing button on chime unit |
| 2 | Wait for blinking light indicating pairing mode |
| 3 | Press doorbell button to send signal |
| 4 | Listen for confirmation sound from chime unit |
If the initial pairing attempt fails, don’t worry. Reset both devices according to your manufacturer’s instructions and repeat the process. The pairing button location varies by model, so consult your user manual for specific details about your wireless doorbell system’s requirements.
Volume Adjustment Settings
With your wireless doorbell successfully paired, you’ll want to customize the volume settings to match your household needs.
The volume control button is typically located on the side or back of your chime unit, making it easily accessible for adjustments.
Most wireless doorbells offer multiple volume levels to suit different preferences and living situations:
- Silent mode – Perfect for naptime or quiet hours when you don’t want disturbances
- Low volume – Ideal for small apartments or when you’re staying close to the chime unit
- Medium volume – Standard setting for average-sized homes with moderate background noise
- High volume – Best for larger homes or noisy environments where you need maximum audibility
Simply press the volume control button to cycle through these options until you find your preferred setting.
Testing Your Doorbell System
Once you’ve completed your no-drill wireless doorbell installation, you’ll need to verify that all components function properly through systematic testing.
Start by pressing the doorbell button to confirm the chime rings and video feed activates correctly. Walk within the motion sensor’s detection range while monitoring if it captures movement accurately, guaranteeing your security features work as intended.
Check your wireless signal strength by observing whether the doorbell maintains consistent network connectivity. Weak signals cause delayed notifications that compromise functionality.
Monitor the battery level regularly, as low power affects overall performance. Replace batteries when needed to maintain dependable operation.
Clean the camera lens and motion sensor periodically to prevent obstructions that reduce video clarity and sensor accuracy.
These simple maintenance steps guarantee excellent doorbell performance.
Battery Management and Maintenance
Because your wireless doorbell relies entirely on battery power, maintaining proper battery management becomes crucial for uninterrupted operation.
Effective battery management is essential for wireless doorbells to ensure reliable, continuous operation without unexpected power failures.
You’ll need to monitor battery levels regularly since most wireless doorbell units last between 6 months to 2 years depending on usage frequency and settings.
Follow these maintenance tips to enhance your doorbell’s performance:
- Check battery status monthly and replace when levels drop to prevent missed alerts
- Use rechargeable batteries when your model supports them for cost-effective, sustainable operation
- Store spare batteries in cool, dry locations to extend their shelf life
- Consult manufacturer guidelines for specific battery type recommendations and ideal settings
Proper battery management guarantees your wireless doorbell maintains consistent functionality while minimizing unexpected downtime from power depletion.
Troubleshooting Common Installation Issues
Even when you’ve followed installation instructions carefully, you might encounter issues that prevent your no-drill wireless doorbell from working properly. These problems often stem from adhesive failure, compatibility issues, or environmental factors affecting your installation.
| Problem | Solution |
|---|---|
| Doorbell won’t stick to surface | Clean the mounting area thoroughly and replace the adhesive strip with a new one |
| Mount keeps falling off | Verify your doorbell and mount are compatible models and choose a more sheltered location |
| Doorbell not responding | Check battery charge level and remove any obstructions blocking the wireless signal |
Remember that extreme weather conditions can compromise adhesive performance, so selecting a protected installation spot improves long-term reliability. Always verify your components are compatible before beginning the installation process.
Removal and Relocation Procedures
You might need to remove your wireless doorbell mount for cleaning, maintenance, or to relocate it to a better position.
The removal process requires careful handling to avoid damaging your wall surface or the mount itself.
Once removed, you can easily relocate your doorbell to optimize its performance and positioning.
Safe Mount Removal
Three simple steps guarantee safe mount removal of your no-drill wireless doorbell mount without damaging your wall surface.
You’ll need to carefully execute each phase to protect both your mount and wall.
- Pull both adhesive strips simultaneously downward while firmly holding the mount to prevent it from falling or jerking against the wall.
- Confirm strips release cleanly from the surface without tearing or leaving fragments that could damage paint or wallpaper beneath.
- Clean the area thoroughly using gentle adhesive remover if residue remains, preparing the surface for future installations.
- Remember adhesive strips are single-use only so purchase replacement strips before relocating your mount to make sure you have proper materials ready.
Always verify your new location offers a clean surface for maximum adhesive performance.
Relocating Your Doorbell
Once you’ve successfully removed your mount using proper strip-pulling techniques, relocating your doorbell becomes straightforward with careful preparation and timing.
Start by thoroughly cleaning the original surface where your mount was attached, removing any leftover adhesive residue completely. This guarantees you won’t leave permanent marks on your wall.
Next, select your new location carefully. The surface must be smooth, clean, and free from any obstructions that could interfere with proper adhesion.
Take time to prepare this area properly before installation.
After you relocate and reattach the mount in its new position, patience is essential. Wait one full hour before reattaching your doorbell unit. This waiting period allows the adhesive to fully bond, ensuring maximum holding strength and preventing potential drops or mounting failures.
Frequently Asked Questions
How Do You Set up a Wireless Doorbell?
You’ll mount your wireless doorbell on a clean, smooth surface using adhesive strips. Connect it to your Wi-Fi network following the manufacturer’s guide, then test functionality and check battery levels regularly.
How Do You Power a Wireless Ring Doorbell?
You’ll power your wireless Ring Doorbell using rechargeable batteries that last 6-12 months. You can also hardwire it to existing doorbell wiring or add a solar charger accessory for continuous power.
How Do I Get My Wireless Doorbell to Work?
Make certain your wireless doorbell’s fully charged, connect it to Wi-Fi following manufacturer instructions, test the button press, check for signal interference from other devices, and regularly update firmware through the app.
How Do Wireless Doorbells Work Without Batteries?
Wireless doorbells work without batteries by using kinetic energy from button presses, connecting to your home’s wiring, harnessing solar power, or employing ultra-low-power communication that requires minimal energy consumption.


Leave a Reply