You’re about to transform your garage into a smart, automated entry point that responds to your commands and schedules. Installing a Z-Wave garage control system might seem complex, but with the right approach and proper component selection, you’ll have professional-grade automation running within hours. The key lies in understanding which GD00Z controller variant matches your specific garage door setup, and there’s a critical step most homeowners overlook that could make or break your entire installation.
Understanding GD00Z Controller Variants and Compatibility
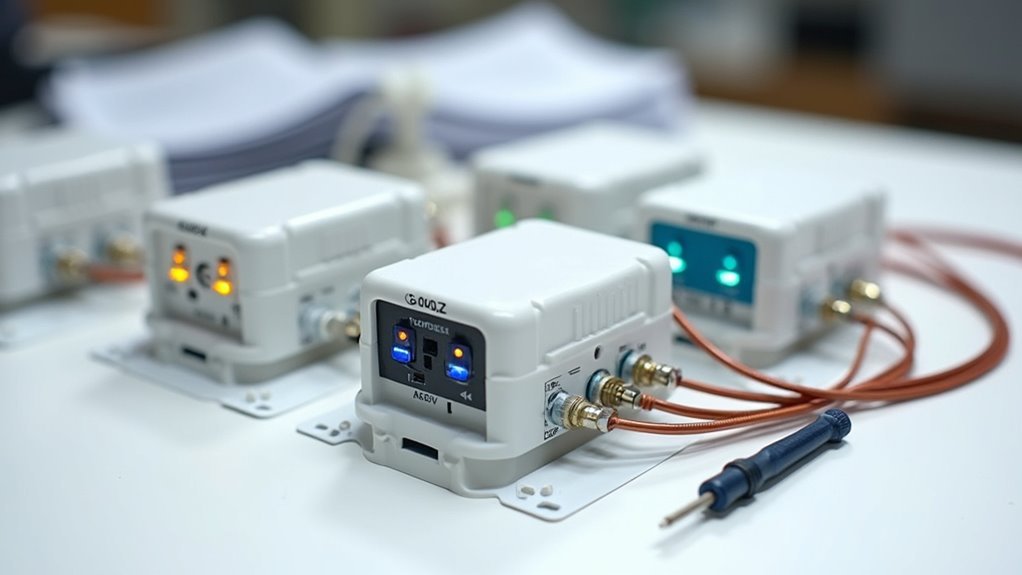
When selecting a GD00Z controller for your garage door automation project, you’ll encounter several variants including NuTone (NGD00Z), GoControl, Linear, and Iris models. Each GD00Z controller variant is specifically engineered for compatibility with different garage door systems, making sure you can find the right match for your setup.
The key is identifying which variant works best with your existing Garage Door Opener infrastructure.
All variants operate using Z-Wave technology, which means they’ll integrate seamlessly with your smart home ecosystem regardless of which model you choose. This standardized approach guarantees consistent performance across different brands.
When evaluating your options, consider your current Garage Door Controller requirements and verify compatibility with your motor system. The unified Z-Wave platform assures reliable communication between devices, making any variant a solid choice for home automation.
Sensor Placement on Garage Door Top Segment
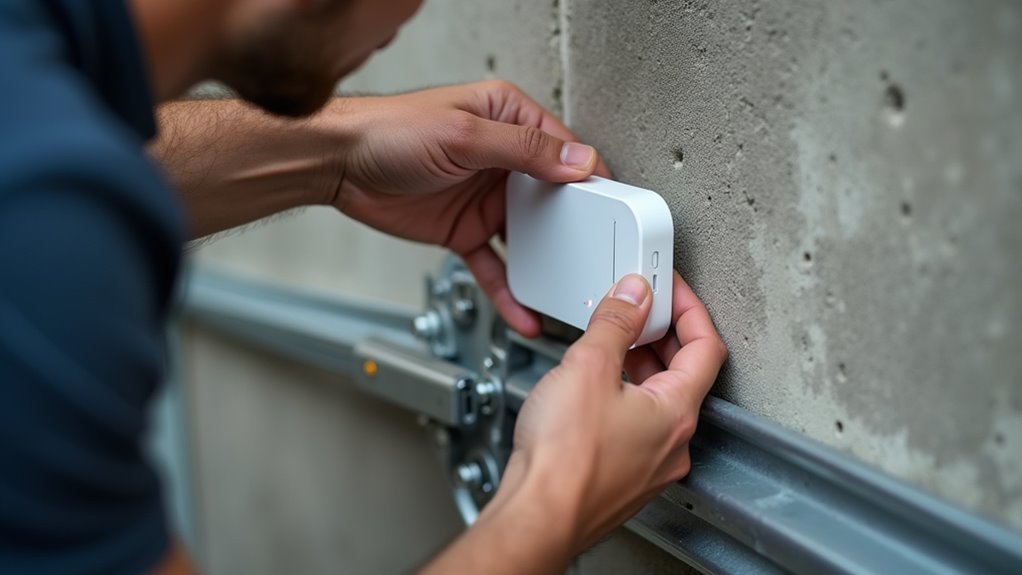
You’ll need to position the small sensor precisely in the middle of your garage door’s top segment for ideal tilt detection.
This central placement guarantees the sensor accurately reads your door’s movement while maintaining proper alignment with the door’s orientation.
Secure mounting is essential since the sensor must stay firmly attached during all opening and closing cycles.
Optimal Sensor Position
Finding the right spot for your Z-Wave tilt sensor directly impacts how accurately it’ll detect your garage door’s position. The ideal position is centered on the middle of the top garage door segment, where it’ll experience the most significant tilt change during operation.
| Factor | Consideration |
|---|---|
| Door Sensor Placement | Center of top segment for maximum tilt detection |
| Alignment Requirements | Level and parallel to door surface |
| Mounting Security | Firm attachment to withstand vibrations |
| Environmental Protection | Away from extreme temperature/humidity sources |
You’ll need to verify proper alignment during installation, as misplaced sensors produce unreliable readings. Mount it securely to handle door vibrations and movements. Consider environmental factors like temperature and humidity that might interfere with functionality. Regularly inspect the sensor’s placement to maintain ideal performance.
Tilt Detection Accuracy
Accurate tilt detection begins with precise sensor positioning on your garage door’s top segment.
Place the small tilt sensor directly in the middle of this section to achieve maximum tilt detection accuracy. This positioning guarantees your garage controller reliably monitors whether your door’s open or closed, eliminating false readings that could frustrate users.
The Ecolink Z-Wave Wireless Tilt Sensor offers superior performance compared to original passive sensors when properly mounted.
You’ll receive dependable notifications through your smart devices, allowing you to confidently control your garage door remotely.
Test your installation by opening the door completely.
Your controller should immediately confirm the status change to “Open,” validating the sensor’s effectiveness and your successful placement.
Mounting Hardware Requirements
Three essential mounting components guarantee your Z-Wave tilt sensor stays securely attached to your garage door’s top segment.
Proper sensor placement requires the right hardware to withstand constant vibrations and movement during operation.
You’ll need these critical mounting components:
- Heavy-duty adhesive strips – Industrial-strength mounting tape that bonds permanently to metal or wood garage door surfaces
- Mechanical screws with washers – Stainless steel fasteners that penetrate the door material for maximum hold strength
- Vibration-dampening pads – Shock-absorbing material placed between the sensor and door surface
Position your sensor in the middle of the top segment, ensuring it’s away from obstructions.
This strategic placement provides accurate tilt detection and peace of mind knowing your sensor won’t shift during door cycles.
Main Unit Mounting Near Garage Door Motor
You’ll need to mount the GD00Z main unit close to your garage door motor to guarantee peak performance and seamless integration with the motor control board.
Position the device within reach of a 120v power outlet since it requires constant power during operation.
Choose a location that’s protected from moisture and temperature extremes while allowing secure mounting with appropriate hardware.
Optimal Placement Location
When mounting your GD00Z garage door controller’s main unit, position it as close to the garage door motor as possible to confirm peak performance and signal reliability. This strategic placement guarantees ideal connectivity between your controller and the motor’s control board.
Follow these essential placement guidelines:
- Power accessibility – Mount within reach of a 120v power outlet to avoid extension cords that could create safety hazards or connectivity issues.
- Secure motor connection – Position the main unit where you can easily connect it directly to the motor control board for reliable communication.
- Signal optimization – Keep the unit away from metal obstructions and interference sources that could weaken your Z-Wave signal strength.
This positioning also simplifies future maintenance and troubleshooting procedures.
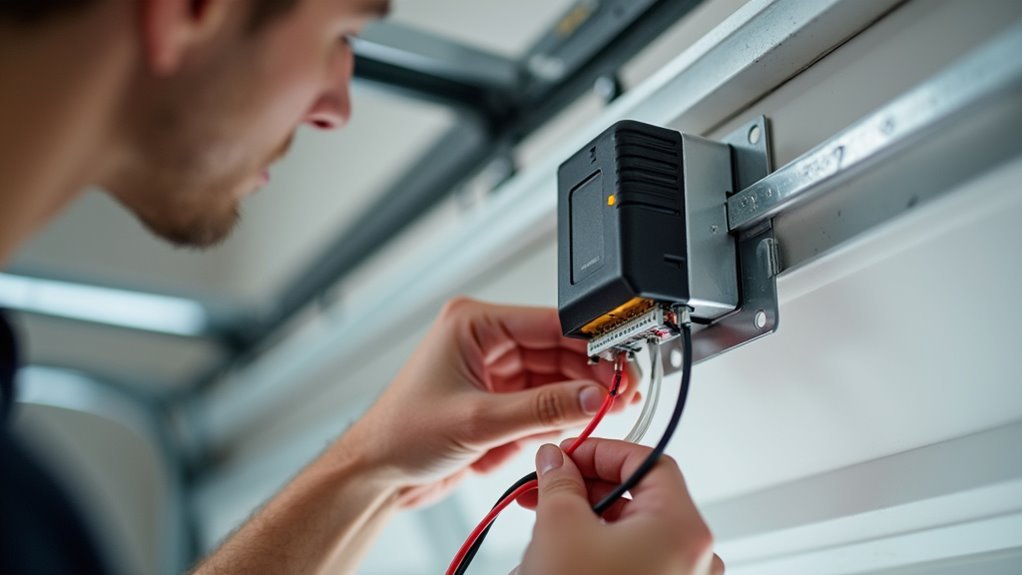
Motor Board Connection
After securing the ideal mounting location, establish a direct connection between your GD00Z main unit and the garage door motor’s control board.
You’ll need to connect the provided wires from your Z-Wave controller directly to the motor’s terminal connections. Make sure you’ve turned off power to the garage door opener before beginning this step.
The main unit should be installed next to your motor housing, keeping cable runs short and secure. Locate the appropriate terminals on your motor control board – typically labeled for auxiliary controls or smart device connections.
Strip the wire ends and connect them according to your motor manufacturer’s specifications. Double-check all connections are tight and properly seated before restoring power to test functionality.
Power Outlet Requirements
One critical requirement for your GD00Z installation is access to a standard 120v power outlet within close proximity to your chosen mounting location.
Without proper power access, your main unit won’t function correctly, leading to unreliable garage door operation.
When planning your installation, consider these essential power requirements:
- Distance matters – Mount the main unit close enough to the power outlet to avoid using extension cords, which can cause connectivity issues.
- Accessibility counts – Choose a location that allows easy access to the outlet for future maintenance and troubleshooting needs.
- Direct connection preferred – Plug the main unit directly into the outlet rather than using power strips or adapters.
Proper power positioning guarantees ideal performance and longevity of your garage door controller system.
Power Connection and 120V Outlet Requirements
Before mounting your GD00Z garage door controller, you’ll need to identify a suitable 120V power outlet located near your garage door motor. This power connection is critical for proper operation and should be established before proceeding with any installation steps.
| Requirement | Specification |
|---|---|
| Voltage | 120V AC |
| Location | Near garage door motor |
| Distance | Minimize wiring length |
| Power Supply | Adequate for controller and devices |
Position your controller close to both the 120V outlet and garage door motor to guarantee secure connections to the motor control board. Verify the outlet provides sufficient power supply for your GD00Z controller and any additional connected devices. Proper placement minimizes wiring requirements and maximizes operational reliability throughout your garage door system.
SmartThings App Device Connection Process
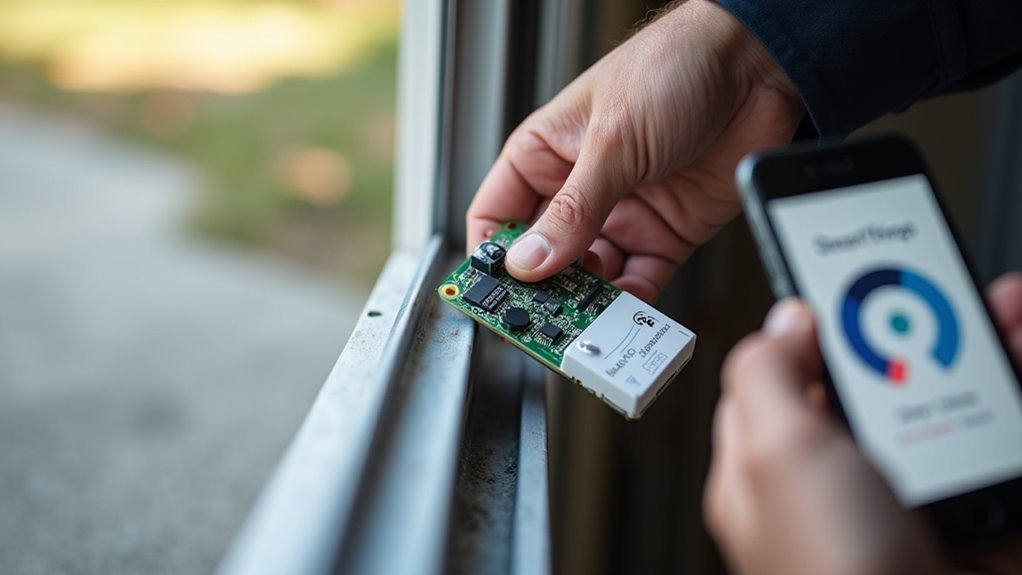
With your GD00Z controller properly powered and positioned, you’ll now connect it to your SmartThings network through the mobile app. The pairing process is straightforward and takes just a few minutes to complete.
Ready to link your GD00Z to SmartThings? The simple pairing process connects your garage door controller in minutes.
Follow these steps to establish the connection:
- Initiate pairing – Open your SmartThings app, select “Connect New Device” from the main menu, then press the button on your GD00Z controller to start the discovery process.
- Configure device settings – Once detected, enter your preferred name and location for the garage door opener to help identify it within your smart home system.
- Test functionality – Open your garage door manually to verify the status updates correctly, then close the garage door using the app command to confirm remote operation works properly.
Pairing Mode Activation and Button Controls
Activating pairing mode on your GD00Z controller requires a simple button press that signals the device’s readiness to connect with your SmartThings hub. Press and hold the button until the device responds with confirmation signals. You’ll hear a beep and see the LED light flash, indicating the controller is actively searching for your hub.
| Action | Device Response | Next Step |
|---|---|---|
| Press button | Beep sounds | Open SmartThings app |
| LED flashes | Pairing mode active | Select “Connect New Device” |
| Hub detects | Confirmation prompt | Enter device information |
Once your SmartThings app detects the controller, you’ll customize the device name and location. After successful pairing, manually open your garage door to sync the position sensor, ensuring accurate status updates appear in your app.
Device Configuration and Naming Setup
Once you’ve successfully activated pairing mode, you’ll need to complete the setup process through the SmartThings app by naming your device and assigning the proper device handler.
Choose a clear, descriptive name like “Main Garage Door” that’ll make voice commands through Alexa simple and intuitive.
The device handler assignment guarantees your garage door controller communicates properly with SmartThings and responds correctly to both app controls and voice recognition commands.
SmartThings App Pairing
To successfully pair your GD00Z garage door controller with SmartThings, you’ll need to open the SmartThings app and select “Connect New Device” before pressing the button on your GD00Z unit.
Once your device appears in the SmartThings app, follow these essential steps:
- Enter your device name and location details for easy identification and management within your smart home system.
- Open your garage door manually to sync the status sensor with the controller, ensuring the app displays “Open” status correctly.
- Test the close command through the app to verify your garage door responds properly to remote commands.
For enhanced functionality, consider customizing the device handler through the SmartThings developer portal using raw code from GitHub.
This optimization improves device management capabilities considerably.
Device Handler Assignment
After completing the basic pairing process, proper device handler assignment becomes your next priority for ideal garage door controller performance.
Navigate to the SmartThings developer portal and locate the specific device handler code for your Garage Door Controller on GitHub. Copy the raw code and paste it into your SmartThings portal to create the custom device handler. Save this configuration and verify your controller type matches the assigned handler exactly.
Once saved, confirm your Garage Door Controller appears correctly in the SmartThings app and responds to test commands.
Choose a simple, descriptive name for voice command compatibility with Alexa. Regularly check GitHub for device handler updates to access community improvements and new features for enhanced functionality.
Alexa Voice Recognition
Voice control integration transforms your Z-Wave garage door controller into a hands-free convenience system that responds to simple Alexa commands.
Setting up Alexa voice recognition requires proper configuration to guarantee seamless operation with your garage controller.
To optimize your Alexa integration:
- Simplify device naming – Choose short, distinct names like “Garage Door” instead of complex identifiers to improve Alexa’s recognition accuracy.
- Use voice training features – Train Alexa to better understand your speech patterns through the available voice training options in your Alexa app.
- Monitor the IDE live log – Check command responses to identify any minor issues with device recognition that you might need to make adjustments for.
Contact Amazon Echo Support if you encounter persistent difficulties, or engage with the SmartThings community for proven naming strategies.
Garage Door Status Synchronization Testing
Proper synchronization between your garage door and the Z-Wave controller requires systematic testing to verify accurate status reporting. Start by opening your garage door normally after installation, allowing the sensor to sync with your GD00Z controller. Confirm the garage door status updates to “Open” in your SmartThings app.
The Ecolink Z-Wave Wireless Tilt Sensor enhances position detection accuracy, improving status update reliability. Test functionality by observing notifications and confirming your GD00Z opener beeps and flashes when receiving commands.
Monitor your system’s consistent performance, ensuring automatic closure if left open for your designated timeframe.
You’ll enhance your experience by implementing a notification system that alerts you when your garage door’s confirmed closed, providing greater peace of mind.
Upgrading to Ecolink Z-Wave Tilt Sensor
You’ll find that replacing your original passive tilt sensor with the Ecolink Z-Wave Wireless Tilt Sensor dramatically improves your garage door monitoring system’s accuracy and reliability.
The sensor replacement process involves removing the old unit and installing the Ecolink sensor on your garage door’s upper segment for peak performance.
This upgrade enhances your peace of mind by providing consistent status updates and seamless integration with your SmartThings ecosystem.
Sensor Replacement Process
One essential upgrade that’ll greatly improve your garage door monitoring system involves replacing the original passive tilt sensor in your GD00Z controller with the Ecolink Z-Wave Wireless Tilt Sensor.
This installation offers enhanced accuracy and reliability for monitoring your garage door status.
The sensor replacement process requires careful attention to positioning:
- Remove the old sensor – Carefully detach the original passive tilt sensor from your garage door, noting its exact placement and orientation.
- Install the Ecolink sensor – Mount the new sensor in the same position, ensuring proper alignment for peak functionality and accurate readings.
- Sync with controller – Connect the Ecolink sensor to your GD00Z controller to enable accurate status reporting in your SmartThings app.
You’ll experience improved real-time updates and fewer false readings.
Enhanced Reliability Benefits
While the installation process might seem straightforward, the true value of upgrading to the Ecolink Z-Wave Wireless Tilt Sensor becomes apparent through its enhanced reliability benefits.
You’ll experience dramatically improved accuracy when monitoring your garage door status, eliminating the frustrating false readings that plagued your original passive sensor. The Ecolink sensor’s superior design integrates seamlessly with Z-Wave technology, delivering consistent performance you can trust.
You’ll gain peace of mind knowing your garage door system provides reliable status updates, enabling sophisticated automation within your smart home ecosystem.
The enhanced reliability reveals advanced SmartApp functionalities while ensuring smooth remote control through your smartphone. This upgrade transforms your garage door monitoring from unreliable guesswork into dependable, accurate reporting that enhances your overall smart home experience.
Custom Device Handler Installation From Github
Custom device handlers from GitHub often provide advanced functionality that isn’t available in standard SmartThings integrations.
You’ll find these community-developed solutions offer enhanced control features for your z-wave garage system.
To install a custom device handler for your Garage Door Controller:
- Access the SmartThings developer portal – Navigate to the portal and locate the raw code of your desired device handler on GitHub, then copy the complete code from the repository.
- Create new Device Handler – Paste the copied code into a new Device Handler within the SmartThings portal, ensuring you save it properly.
- Configure and test – Assign the correct type to your Garage Door Controller, then reconnect it to verify proper command response and functionality.
Regularly check the GitHub repository for updates to maintain peak performance.
SmartApp Integration for Automated Functions
After installing your custom device handler, you’ll want to enhance your garage door’s capabilities through SmartApp integration. Access the SmartThings developer portal and GitHub to find pre-existing SmartApp templates specifically designed for garage door control.
Add the repository from GitHub in SmartThings, then execute updates to include new SmartApps for automated functions.
Publish custom SmartApps for personal use to enable specific features like notifications when your garage door opens or closes. Create automated routines that trigger based on time schedules, user presence, or other connected devices. You can set your garage door to open when you arrive home or close at specific times.
Collaborate with the SmartThings community to share code modifications and enhance your automated garage door functionality.
System Performance Testing and Validation
Thorough testing guarantees your Z-Wave garage door system operates reliably and integrates seamlessly with your SmartThings hub.
Performance testing validates every component functions correctly and delivers consistent results.
Start by verifying your GD00Z garage door opener beeps and flashes when commanded to open or close. Next, confirm status updates display accurately in the SmartThings app by opening the door and checking the sensor reads “Open.”
Test these critical functions systematically:
- Remote Control Validation – Open and close your garage door via smartphone under various conditions and usage patterns.
- Automatic Closure Monitoring – Verify the door closes automatically within designated time limits when left open unintentionally.
- Command Tracking – Use IDE live logs to monitor commands from SmartThings app or voice assistants for troubleshooting.
Auto-Close Features and Notification Settings
While basic door control provides essential functionality, configuring auto-close features and notification settings transforms your Z-Wave garage system into a proactive security solution. You’ll receive real-time alerts whenever your garage door opens or closes, guaranteeing you’re always informed about access to your home.
The SmartThings app lets you customize auto-close duration to match your specific needs. You can set notifications for both opening and closing events, providing complete activity tracking.
| Setting Type | Purpose |
|---|---|
| Auto-Close Timer | Automatically closes door after set period |
| Open Notifications | Alerts when garage door opens |
| Close Notifications | Confirms successful door closure |
| Duration Customization | Adjusts auto-close timing preferences |
Test your auto-close feature regularly to guarantee peak performance and adjust settings as needed for maximum convenience and security.
Troubleshooting Common Installation Issues
Even with careful installation, you’ll likely encounter a few hiccups when setting up your Z-Wave garage door controller.
Despite following installation instructions perfectly, expect some connectivity challenges and positioning adjustments when configuring your new Z-Wave garage door system.
These issues typically stem from positioning problems or wireless interference that affects connectivity between components.
Here are three essential troubleshooting steps:
- Check positioning – Mount your main controller near the garage door motor and power outlet, while placing the tilt sensor on the middle of the top garage door segment for accurate readings.
- Re-sync the system – If door status doesn’t update properly in SmartThings, manually open and close your garage door after initial setup to refresh the connection.
- Monitor for interference – Use the IDE live log to track real-time feedback and identify wireless device conflicts that may disrupt connectivity.
Frequently Asked Questions
How Do You Reset the Z-Wave Garage Door Opener?
You’ll need to locate the reset button on your device, press and hold it for ten seconds until the LED flashes, then wait for it to turn off completely.
Is Liftmaster Myq Z-Wave Compatible?
LiftMaster MyQ isn’t natively Z-Wave compatible since it uses its own proprietary protocol. You’ll need a third-party device like the GD00Z Z-Wave controller to integrate your MyQ opener into Z-Wave networks.
What Is the Z-Wave Garage Door Opener?
You’ll get a smart device that connects to your garage door motor, letting you control and monitor your garage remotely through smartphone apps and home automation systems using Z-Wave technology.
How Do You Reset the Gocontrol Garage Door Opener?
You’ll locate the reset button near the motor unit, press and hold it for 10 seconds until the LED blinks, then re-pair it with your SmartThings app following setup instructions.


Leave a Reply