
You’ve probably experienced the frustration of walking into a dark room with your hands full, wishing the lights would just turn on automatically. ZigBee occupancy sensors can transform your home into an intelligent environment that responds to your presence, but there’s more to setting them up than simply mounting devices on walls. The key lies in understanding how these sensors communicate with each other and knowing exactly where to place them for maximum effectiveness.
Understanding ZigBee Technology and Network Architecture
When you’re setting up a smart home automation system, ZigBee technology stands out as one of the most reliable wireless communication protocols available.
You’ll benefit from its mesh network architecture, where devices communicate efficiently through interconnected nodes that extend your network’s range automatically.
Your ZigBee network requires one coordinator that connects to multiple routers and end devices, creating a stable foundation for your automation system.
ZigBee routers boost performance by extending coverage and supporting more connected devices throughout your home.
When you install a motion sensor or other battery-powered end device, it’ll rely on nearby routers to communicate with the coordinator.
You’ll appreciate ZigBee’s low-power consumption and minimal bandwidth requirements, ensuring your devices operate reliably while conserving energy for extended battery life.
Essential Hardware Components for Occupancy Detection
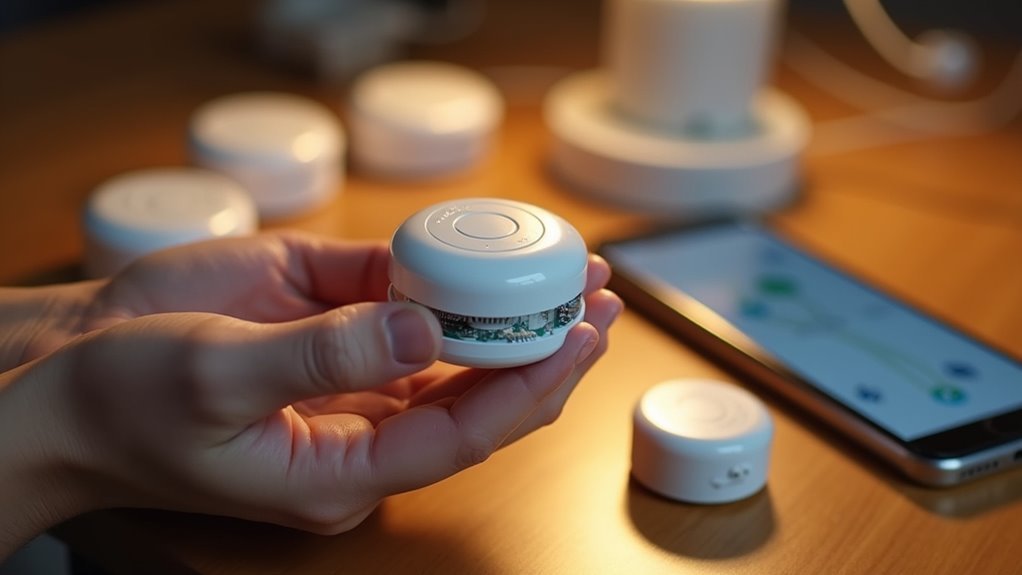
Building your ZigBee occupancy detection system requires several key hardware components working together seamlessly.
You’ll need a Zigbee-compatible gateway as your foundation, connecting motion sensors to your smart home network and enabling device communication with your hub.
The Sonoff SNZB-06P stands out among Zigbee devices for occupancy detection, detecting both movement and stationary persons while doubling as a network router to boost coverage.
The Sonoff SNZB-06P excels at detecting both moving and stationary occupants while extending your Zigbee network range.
You’ll require a stable 5V/1A power supply, typically through USB-C cables, positioned strategically for peak sensitivity.
Choose motion sensors with adjustable sensitivity settings to minimize false positives from pets or fans.
Integration with platforms like Home Assistant activates automation potential, automatically controlling lights based on occupancy detection with customizable timeout periods for enhanced convenience.
Choosing the Right ZigBee Coordinator and Gateway
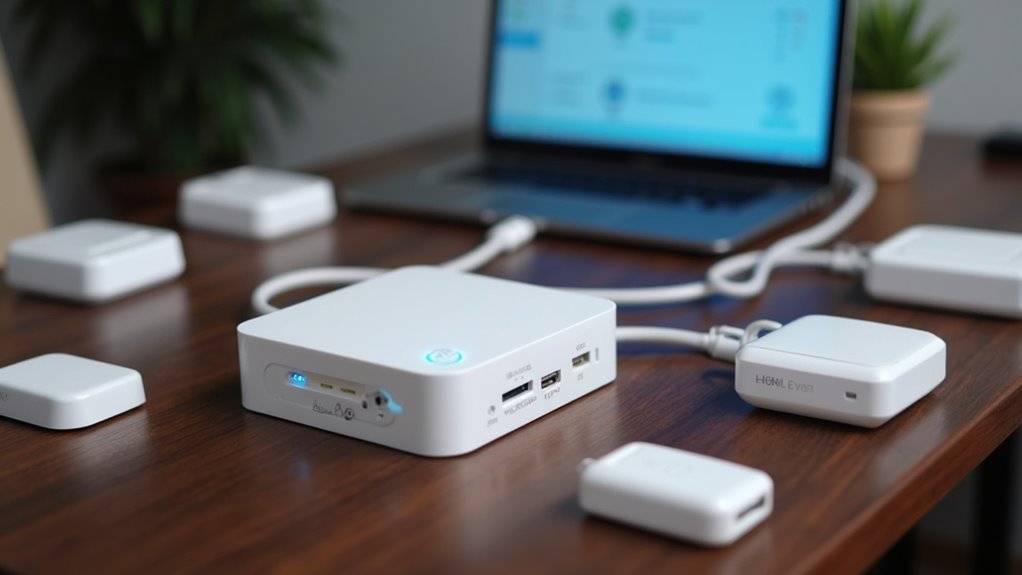
Your ZigBee occupancy detection system’s performance hinges on selecting the right coordinator and gateway combination. The Zigbee coordinator serves as your network’s central hub, while the Zigbee gateway manages device communication and integration.
When choosing your setup, prioritize these critical factors:
- Compatibility verification – Confirm your Zigbee coordinator works with the zigpy library for seamless Home Assistant integration and supports user-friendly applications like Smart Life or Zigbee2MQTT for easy device management.
- Network capacity planning – Consider how many devices you’ll connect, as coordinators can support multiple routers and end devices to expand coverage.
- Connection stability – Choose coordinators with stable local serial port connections and avoid Serial-Proxy-Server setups over Wi-Fi, WAN, or VPN networks.
Selecting Occupancy Sensors for Different Room Types
Different room types require specific sensor technologies to achieve ideal occupancy detection performance. For living rooms and bedrooms, you’ll want PIR sensors since they’re cost-effective and respond immediately to movement when someone enters.
However, in hallways or bathrooms where movement is minimal, mmWave radar sensors work better because they detect even stationary occupants.
Consider adjustable sensitivity options like the Sonoff SNZB-06P, which offers detection ranges of 2.5m, 3.5m, or 4m to match your room size and activity patterns.
For outdoor or high-traffic areas, choose Zigbee router devices that enhance network coverage and stability. Always verify your sensors are compatible with your existing Zigbee gateway, and add routers for larger layouts to maintain reliable occupancy detection across your network.
Installing and Positioning Sensors for Optimal Coverage
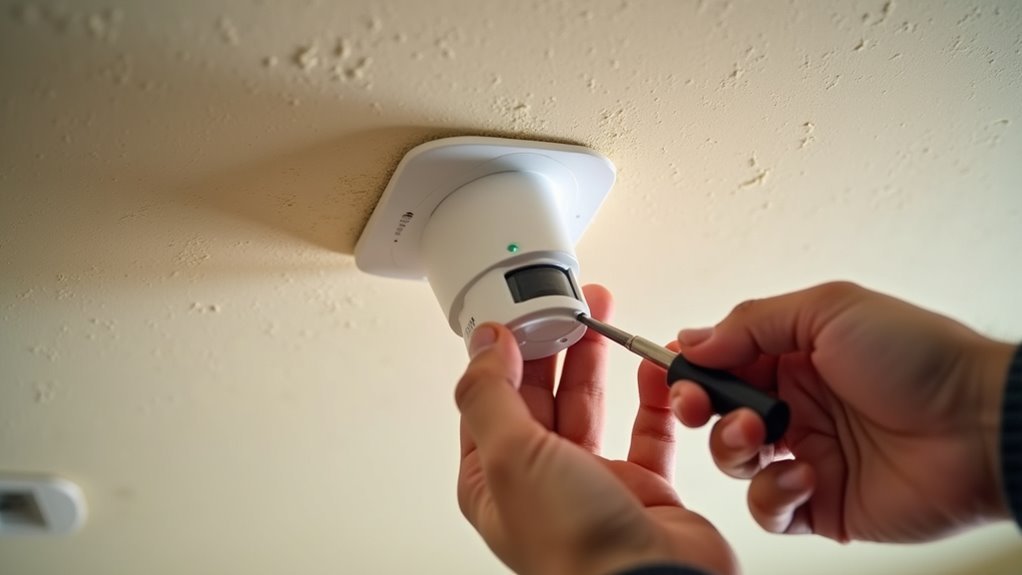
After choosing the right sensors for your rooms, proper installation and positioning determine whether your occupancy detection system performs reliably or creates frustrating gaps in coverage.
Mount your sensors at least 2.5 meters high and angle them downward to maximize detection range while avoiding false triggers from pets. Clear line-of-sight to movement paths guarantees accurate detection and faster response times.
Here’s your installation checklist:
- Deploy multiple Zigbee router devices to strengthen network coverage and prevent communication drops across larger areas.
- Adjust sensor sensitivity based on environmental factors like ceiling fans or large furniture that might obstruct detection zones.
- Test and refine placements regularly, since initial positions may not detect movement effectively once you observe real-world usage patterns.
Pairing Zigbee Devices With Your Smart Home Hub
Before your Zigbee occupancy sensors can communicate with your smart home system, you’ll need to establish a proper gateway connection and complete the pairing process.
This integration requires specific setup requirements for your Zigbee hub, followed by activating pairing mode on each sensor according to manufacturer guidelines.
Once you’ve initiated the pairing sequence, your smart home app will guide you through the network integration steps to bring each device online.
Gateway Setup Requirements
Since ZigBee occupancy sensors can’t communicate directly with your smartphone or home network, you’ll need a compatible ZigBee gateway to bridge this connection. This essential hub serves as the translator between your sensors and smart home ecosystem.
Before starting the setup process, confirm your Zigbee gateway meets these requirements:
- Power and Network Connection – Your gateway must be plugged in and connected to your home Wi-Fi network for proper functionality.
- Smart Life App Installation – Download and set up the Smart Life App on your smartphone to manage device pairing and configuration.
- Sensor Compatibility – Verify your occupancy sensors support the same ZigBee protocol version as your gateway for seamless integration.
Once these requirements are met, you can activate pairing mode and begin connecting your sensors.
Sensor Pairing Process
With your gateway properly configured, you can now begin pairing your ZigBee occupancy sensors. The sensor pairing process is straightforward and integrates seamlessly into your Zigbee Home Automation system.
First, verify your hub is powered and connected to Wi-Fi. Next, activate pairing mode on your sensor by following the manufacturer’s instructions—typically pressing a button on the device.
| Step | Action |
|---|---|
| 1 | Open your smart home app (Smart Life) |
| 2 | Navigate to device addition section |
| 3 | Select “Add Zigbee sensor” option |
The app will search for nearby devices. Once your occupancy sensor appears, select it to complete pairing. After successful connection, you’ll configure the sensor’s settings and integrate it into your automation routines for efficient occupancy detection throughout your home.
Network Integration Steps
Once you’ve successfully paired your ZigBee occupancy sensor, the next essential phase involves integrating it seamlessly into your smart home network.
This process guarantees your sensor communicates effectively with other connected devices and automation systems.
Follow these network integration steps:
- Configure Device Settings – Access your smart home app’s device management section and customize the sensor’s sensitivity, detection range, and timeout settings to match your specific room requirements.
- Establish Automation Rules – Create conditional triggers that activate when occupancy detection occurs, such as turning on lights, adjusting thermostats, or activating security cameras based on movement patterns.
- Test Network Communication – Verify the Zigbee sensor maintains stable connectivity by monitoring signal strength and response times throughout your home’s mesh network coverage area.
Configuring Home Assistant for ZigBee Integration
Before diving into Home Assistant configuration, you’ll need a compatible Zigbee coordinator like a pre-flashed dongle to establish reliable communication with your occupancy sensors.
The Zigbee dongle serves as your network’s foundation, enabling seamless device communication.
Set up Home Assistant within a Docker container for ideal performance. Navigate to Configuration > Integrations and add Zigbee Home Automation.
Docker containers provide the most reliable foundation for Home Assistant installations when integrating Zigbee devices.
Select the correct serial port for your coordinator during setup.
Once configured, pair your occupancy sensors by activating their pairing mode—typically done by pressing a device button.
Home Assistant will detect and register them within seconds.
After pairing, these sensors create entities you can use for automations, like motion-triggered lighting.
Remember to regularly update device firmware through Zigbee2MQTT for ideal compatibility.
Setting Up Motion Detection and Occupancy Rules
After establishing your ZigBee coordinator and pairing your sensors, you’ll need to configure motion detection rules that accurately distinguish between genuine occupancy and false triggers.
Start by adjusting your sensor’s sensitivity settings to minimize false positives from environmental factors like ceiling fans or pets. This guarantees your motion detection accurately reflects actual occupancy.
Here’s how to create effective automation rules:
- Set trigger conditions – Configure lights to activate when motion is detected in specific rooms.
- Define timeout periods – Establish 5-10 minute delays before lights turn off after no motion is sensed.
- Combine sensor types – Use PIR sensors for immediate detection and mmWave sensors for stationary occupancy in living areas.
Regularly test and reposition sensors to optimize detection accuracy, as placement considerably impacts performance.
Creating Automated Lighting and Climate Control
With your motion detection rules properly configured, you can now leverage ZigBee occupancy sensors to create sophisticated automated lighting and climate control systems that respond intelligently to your daily routines.
Your occupancy detection system can automatically adjust lights based on real-time occupancy status and ambient light levels. When you enter a room, automated lighting will illuminate to ideal brightness, then dim or turn off when the space becomes unoccupied for your specified duration.
Beyond lighting, you’ll integrate climate control by programming thermostats to adjust temperatures based on room occupancy. Your HVAC system will reduce heating or cooling in empty rooms while maintaining comfort in occupied spaces.
Multiple ZigBee routers throughout your home guarantee reliable sensor communication, enabling seamless automation across larger areas while maximizing energy efficiency and convenience.
Optimizing Network Performance and Range
Since your automated systems depend on consistent communication between occupancy sensors and your home automation hub, enhancing your ZigBee network’s performance and range becomes essential for reliable operation.
Here are three key strategies to maximize your Zigbee network performance:
1. Deploy Multiple Router Devices – Add Zigbee routers throughout your home to enhance coverage and support more devices.
Devices like the Sonoff SNZB-06P act as routers while providing functionality, strengthening your mesh network by facilitating message passing between nearby devices.
2. Maintain Stable Coordinator Connections – Keep your Zigbee coordinator connected directly via serial port.
Avoid Serial-Proxy-Server connections over Wi-Fi, WAN, or VPN to prevent communication drops.
3. Strategic Sensor Placement – Position occupancy sensors carefully to maximize sensitivity while minimizing false positives from interference sources like fans or pets.
Regularly update device firmware through Zigbee2MQTT’s OTA capabilities for peak compatibility.
Troubleshooting Common Connection Issues
Even with ideal network configuration, you’ll occasionally encounter connection problems that disrupt your occupancy sensor’s performance.
Start by verifying your Zigbee coordinator maintains a stable local connection, as unreliable links cause communication disruptions. Check device compatibility and ascertain sensors remain within range for strong mesh network signals.
A stable Zigbee coordinator connection forms the foundation of reliable occupancy sensor communication and prevents disruptive network failures.
When sensors get stuck in the “ON” state, reset them by unplugging or cycling through modes to resolve temporary Zigbee connection issues.
Adjust sensitivity settings since environmental factors like fans or pets trigger false positives or missed detections. Regular firmware updates for both your coordinator and sensors improve stability and connectivity.
These proactive troubleshooting steps will keep your occupancy detection system running smoothly and reliably.
Managing Firmware Updates and Device Maintenance
You’ll need to keep your Zigbee occupancy sensors running smoothly through regular firmware updates and proactive maintenance.
Modern Zigbee networks support Over-The-Air (OTA) updates that let you upgrade device firmware remotely without physical access to each sensor.
When issues arise, you’ll want systematic troubleshooting methods to quickly identify whether problems stem from firmware bugs, network interference, or hardware failures.
OTA Update Methods
How can you keep your ZigBee occupancy sensors running at peak performance without manually accessing each device? Over-the-air (OTA) updates provide the solution, allowing seamless firmware updates that enhance occupancy detection accuracy and overall functionality.
Three Essential OTA Update Methods:
- Zigbee2MQTT Integration – Check for and install latest firmware versions directly through the application interface, streamlining your update process for all compatible devices.
- Automated Update Scheduling – Configure regular firmware checks to guarantee your occupancy sensors receive critical bug fixes and performance improvements without manual intervention.
- Version Documentation System – Maintain detailed records of firmware versions and any encountered issues to facilitate troubleshooting and provide valuable feedback for future updates.
Regular firmware updates minimize compatibility issues while maximizing network stability across your entire ZigBee ecosystem.
Troubleshooting Device Issues
While implementing OTA updates keeps your ZigBee occupancy sensors current, you’ll occasionally encounter device-specific issues that require hands-on troubleshooting beyond standard firmware maintenance.
Document your firmware versions to streamline troubleshooting when connectivity problems arise. If sensors become unresponsive or stuck, reset them or cycle their power to clear temporary glitches.
Physical placement greatly impacts performance. Large furniture or appliances can block detection patterns, so reposition sensors to eliminate interference.
Check mounting height and angle specifications to guarantee ideal coverage.
When problems persist despite proper placement and current firmware, contact manufacturer support for defective units.
Report recurring issues to help manufacturers improve quality control and develop better solutions for common problems affecting occupancy sensors.
Expanding Your System With Additional Smart Devices
Once you’ve successfully installed and configured your ZigBee occupancy sensors, expanding your smart home network becomes straightforward and rewarding.
You can enhance automation capabilities by adding compatible devices that work seamlessly with your existing setup.
Here are three essential device categories to take into account:
- Environmental monitors – Add temperature and humidity sensors to create climate-based automations alongside occupancy detection.
- Security devices – Incorporate door/window sensors and motion detectors to build thorough security monitoring throughout your home.
- Network extenders – Install mains-powered smart plugs and outlets as ZigBee routers to improve coverage and support more connected devices.
Ensure new devices are compatible with your ZigBee coordinator and use platforms like Zigbee2MQTT for effective management.
Remember to check for firmware updates regularly to maintain peak performance across your expanded network.
Frequently Asked Questions
How to Connect Zigbee Temperature Sensor to Home Assistant?
You’ll need a compatible Zigbee gateway connected to Home Assistant. Put your temperature sensor in pairing mode, then navigate to Configuration > Integrations, add Zigbee Home Automation, and select your dongle’s serial port.
Is Zigbee Used for Home Automation?
Yes, you’ll find Zigbee’s perfect for home automation. You can control lights, sensors, locks, and switches through its mesh network. It’s low-power, secure, and works with popular platforms like Home Assistant.
Do I Need a Zigbee Hub With Home Assistant?
You’ll need a Zigbee coordinator with Home Assistant to connect Zigbee devices. Use compatible USB dongles like CC2531 or ConBee II with zigpy library support for reliable local communication.
Do All Zigbee Devices Need a Hub?
Not all Zigbee devices need a traditional hub, but you’ll always need a Zigbee coordinator or gateway. This device manages your network and lets devices communicate, whether it’s built into your system or standalone.


Leave a Reply